Kombucha Chicken with Pineapple and Bell Pepper

Making a play on Sweet and Sour Chicken, kombucha adds a whole new element to the flavors of this Chinese-American dish.  Kombucha is fermented sweet tea so along with the sweetness, there’s a vinegar aspect and a hint of earthiness from the black tea.

The pineapple and bell peppers work amazingly with the honey, soy, and cilantro sauce.  Keeping the vegetables in large chunks retains their crunch and allows you to eat them more easily with chopsticks.  A little chili brings some heat into the mix and the ginger brings a brightness and a burst of flavor.

Everything takes about an hour - when served over saffron rice (recipe below) and with a side-salad, a healthy meal emerges.  

Kombucha Chicken with Pineapple (printable recipe)

  • 6 thighs of chicken
  • 1 teaspoon of oil
  • 16 ounces of plain kombucha
  • 3 tablespoons of soy sauce
  • 1 tablespoon of balsamic vinegar
  • 1 teaspoon of ginger, minced fine
  • 1 tablespoon of honey
  • 1 jalapeno, diced fine
  • 1/2 pineapple, cut into chunks
  • 1 carrot, diced
  • 1 red bell pepper, cut into chunks
  • 2 tablesopoons cilantro, minced
  • juice of one lime
  • salt and pepper

Season both sides of the chicken with salt and pepper.  In a pan over medium-high heat, add about a teaspoon of oil to cover the bottom and add the chicken, skin-side down.  Sear the skin until it is crispy, about 10-12 minutes.

While the chicken is crisping, in a small pot, bring the kombucha to a simmer.  When the chicken is done searing, add it to the pot with the kombucha.  Allow the thighs to simmer for 30 minutes.

Drain the oil and rendered fat from the pan and add the jalapeno, carrot, soy sauce, balsamic vinegar, ginger, honey, and a teaspoon of salt.  Make sure to scrape the browned bits from the bottom of the pan.  Turn the heat down to low and let all of these reduce while the chicken braises.

After 20 minutes, add the pineapple and bell pepper to the pan with the sauce.  10 minutes later, when the chicken is done braising, pull the thighs from the kombucha and add it to the pan with the pineapple and the bell pepper.

Turn the heat to high.  Give everything a few turns to coat the chicken well, about 5 minutes.  Kill the heat, add the lime juice and the cilantro and serve hot over rice.

Saffron rice
Follow instructions for 4 servings of rice from package and add a pinch of saffron (about 10 “hairs”) and a tablespoon of butter.  Be sure to rinse the rice well.


Posted
Authordavid koch
CategoriesRecipes
2 CommentsPost a comment
Share

Greek Salad with Tzatziki Dressing

It’s summer and the markets are inundated with fresh delicious tomatoes.  I was lucky enough to receive a large bag of ripe beefsteak tomatoes from my Dad’s backyard garden so I enjoyed creating different tomato recipes all week.  

This is a slightly different take on the Classic Greek Salad. I used a tzatziki sauce to dress the tomatoes to make them a little richer. This hearty salad could be used as a side dish and served family style, or as a light main course.


Greek Salad with Tzatziki Dressing (printable recipe)

Salad


  • 5-6 ounces of your choice of greens (I used part romaine and part arugula)
  • 1/4 of a small red onion, thinly sliced
  • 2 large beefsteak tomatoes or heirloom
  • 1/3 cup feta cheese, crumbled
  • 1/4 cup of kalamata olives, halved lengthwise
  • Juice of 1/2 lemon
  • 1 tablespoon extra virgin olive oil
  • Salt and pepper


Tzatziki Dressing


  • 1 cup plain yogurt
  • 1/3 cup cucumber, seeded and finely diced
  • Juice of 1 lemon
  • 1 tablespoon cilantro, chopped
  • 1/2 tablespoon mint, chopped
  • Salt and pepper


For the dressing, combine all ingredients and season with salt and pepper to taste. Set aside.

On a large platter, pile on greens and red onion then dress with lemon and olive oil. Lay tomato slices across the top of the greens and then season with a little salt and pepper. Spoon tzatziki dressing down the center of the tomatoes and then sprinkle the entire salad with the feta and olives. Enjoy!

Serves 2 as a main and 4 as a side dish


Posted
AuthorAmy Koch
CategoriesRecipes
2 CommentsPost a comment
Share
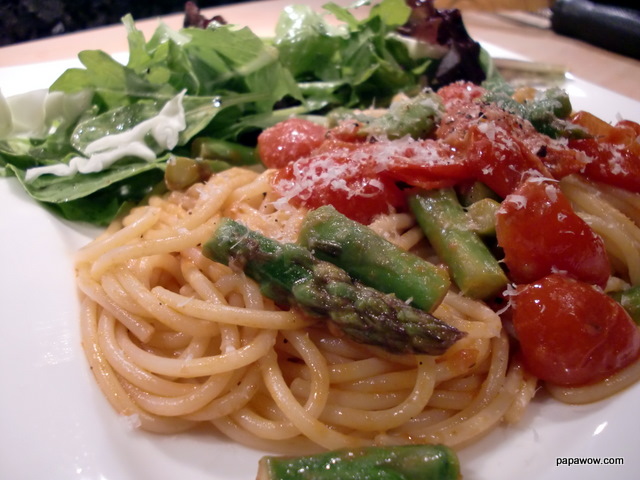
Spaghetti with Butter-Stewed Tomatoes and Asparagus
This technique makes for a delicious, easy meal for the work-week.  It can be assembeled with a pot and a pan in about 30 minutes with minimal supervision.  Asparagus can be replaced by ________ [insert vegetable here] - you can make it with what you have on hand by only swapping out one ingredient in the recipe.

 
There is a richness and yet simplicity in this vegetarian dish.  The tomatoes become velvety as they dress the pasta.  The asparagus gives the dish some body and elegance.  The butter adds a richness that provides satiety.  A simple side salad rounds out a meal.

Spaghetti with Butter-Stewed Tomatoes and Asparagus (printable recipe)
  • 1/2 pound of spaghetti
  • 1/2 pound of asparagus, cut into 1 inch lengths
  • 1 8-ounce package of cherry tomatoes, halved
  • 4 tablespoons butter
  • 1 tablespoon of olive oil
  • 6 sprigs of fresh thyme
  • 1 tablespoon of tomato paste
  • 1/4 cup Parmesan cheese, grated
  • salt and pepper
Add 2 tablespoons of the butter and the olive oil to a pan over low heat and add the tomatoes, the thyme, a teaspoon of salt, and a 1/2 teaspoon ground black pepper.  Simmer on low heat, stirring occasionally, for 20 minutes until the tomatoes almost completely break down.

Bring a large pot of water to a boil, add salt, and cook the spaghetti to al dente.  After cooking the tomatoes for 20 minutes, add the asparagus and the tomato paste to the pan and turn the heat up to medium. Cook until asparagus is cooked through, about 5 minutes.

Once the spaghetti is done, strain well and add it to the pan with the tomato sauce.  Add the other 2 tablespoons of butter.  Toss together and check for seasonings. Serve warm and garnish with Parmesan cheese.

Serves 2


Posted
Authordavid koch
CategoriesRecipes
Share
Black Bean, Potato, and Soyrizo BurritosBlack beans and potatoes are like Batman and Robin as far as I’m concerned.  These two can fight off the most ferocious noises my stomach can make when it is doing its Rancor impression.  Add cabbage, sour cream, cheese, some faux chorizo and our vegetarian burrito worthy of the Justice League is complete.

This vegetarian dish is inexpensive, easy, hearty, and delicious.  Carnivores won’t even know they’re eating soy-chorizo, I promise.  There is some prep involved, but the beans can be made  a day ahead and the potatoes can be par-baked ahead too.

The crunch of fresh cabbage, the vibrant note of paprika in the chorizo, the pizzazz of cheddar cheese, and the sweet-cool sour cream all balance the earthiness of the burrito’s “meat”.  You have all the components of a fine meal; it’s complemented well with a side salad.

You must plan a few hours ahead; I would highly recommend making your own beans from a bag of dries ones.  They seem to be more flavorful and the texture is far more appealing than canned.  It takes more time than simply opening a tin but in the words of Alton Brown, “Your patience will be rewarded.”

I used the quick-cook method for the beans instead of allowing them to soak overnight.  The potatoes also need to be par-cooked.  They crisp up far better under the broiler so that you get nice golden brown edges and more of that tasty roasted flavor.  Here we go:

Black Bean, Potato, and Soyrizo Burritos (printable recipe)
  • 1 cup of dried black beans, sorted and any rocks removed, rinsed well
  • 1/2 a 14 ounce package of Soyrizo
  • 6 small Yukon Gold potatoes
  • 1/2 a yellow onion, diced
  • 1/4 head of cabbage, shredded
  • 1 cup of cheddar cheese, shredded
  • 2 tablespoons of olive oil
  • salt and pepper
  • sour cream for garnish

For the black bean, onion and Soyrizo mixture:

Sort and rinse your beans, place them in a pot with enough water to cover them by an inch.  Bring them to a boil covered for about 15 minutes then kill the heat and allow them to cool.  Give them an hour to soak.

Once the beans have soaked for an hour, drain and rinse them again.  Place the beans back in the pot, add 3 cups of water, bring them back to a boil, cover, then reduce the heat.  Give them another hour to cook at a simmer.  

Once the beans have had about an hour to cook, taste them to make sure they are soft, kill the heat, then drain and set aside.  

Saute the onions with the Soyrizo in a pan over medium-high heat in a teaspoon of olive oil, add a pinch each of salt and pepper.  Stir the mixture often to break up the Soyrizo; cook just until the onions soften.   Add the beans to the mixture to re-heat them and incorporate well.

For the potatoes:

Set your oven to 350 and put the potatoes in whole, on a sheet pan to bake.  After 30 minutes, remove and set them aside to cool.  Once the potatoes have cooled enough to be handled, quarter them.

Using a large bowl, toss them with a little olive oil, salt, and pepper.  Turn on the broiler and slide the potatoes inside, give them about 15 minutes to crisp up nicely.  Remove the potatoes from the oven once their edges brown.

To assemble:

Warm up some tortillas over the open flame of a gas stove, or wrap up in some dampened paper towels and microwave for 30 seconds.  

Take a warm tortilla and add some of the black beans, onion, and Soyrizo mixture, a few potatoes, some shredded cheddar cheese, shredded cabbage, a dollop of sour cream, and your favorite hot sauce.  

Make some sort of futile attempt not to eat too many so that you fall asleep on the couch.  Enjoy!


Soyrizo and Onions
Posted
Authordavid koch
CategoriesRecipes
Share

Joe Jost's Special

I grew up in Long Beach California, and like every town in America, there's one bar that everyone, and I mean EVERYONE knows.  Enter Joe Jost's - the place is an icon, practically representing the fair City of Long Beach in all corners of the earth.  You could be at a secondary school rugby match in Fiji and see some guy wearing a Joe Jost's T-shirt.

It's been around since the early 1920's and if you're not up on American history, that means it survived prohibition.  (By the way, the only good thing that came of Prohibition was women's suffrage, but that's another post).  Joe Jost's has survived 80+ years by sticking to the basics and doing them well.

They serve cold beer, very cold, 29 degrees cold.  That's below freezing for you literary types and they serve it in giant frozen 15 ounce glasses called Schooners.  The sheer mass of the Schooner keeps your beer cool drastically longer than a standard pint glass, and while they stay cool, they look a heck of a lot cooler too.

Besides cold beer, there's root beer, peanuts, pickled eggs, and five different kinds of sandwiches: cheese, liverwurst, hot dogs, a salami sandwich, and Joe's Special.  

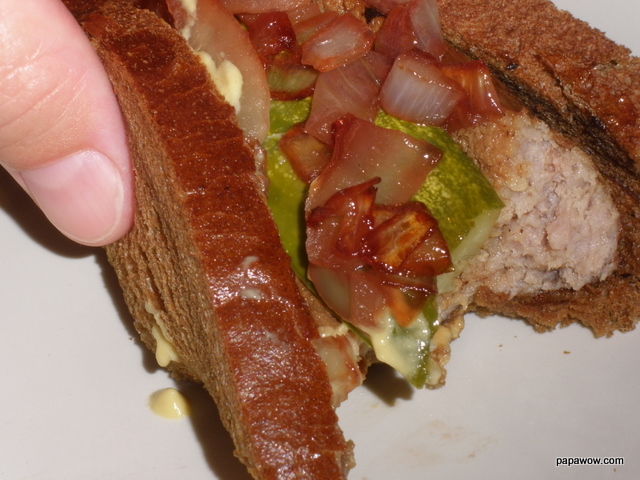
Joe's Special is it.  While I'm sure the other sandwiches are good, the Special is the only sandwich anyone in my company has ever ordered.  In their own words, a Special is, "A Polish Sausage made from our family’s own blend of spices, slice of Swiss cheese and pickle, mustard on rye bread."

With a Schooner in one hand and Joe's Special in the other, life can be pretty grand.   Recently we recreated them in our own home, and while I omitted the Swiss cheese, I added an onion relish.  You could do them together, the combination of flavors will be delicious.  Try this at home:

Joe's Special (printable recipe)

  • 1 Polish sausage, grilled and split lengthwise
  • 1 slice of Rye bread
  • 1 dill pickle spear
  • 1 healthy slathering of Dijon mustard, about a tablespoon
  • 1 slice of Swiss cheese

For the onion relish:

  • 1/2 yellow onion, diced
  • 1/4 cup red wine vinegar
  • 1 teaspoon sugar
  • 1 tablespoon water

Put all of the ingredients for the onion relish in a pan over medium heat.  Cook until the onions soften and the liquids reduce, about 12 minutes. 

Put the cheese on the piece of bread.  Place the Polish sausage into the slice of rye and configure the dill pickle spear to fit like a key inside of the split in the sausage.  Add a slouge of mustard, a table spoon of onion relish, and fold together like a taco.  

Wrap up in a paper towel or parchment paper.  Try not to drool in your beer.


Making a "Joe's Special" from Papawow on Vimeo.

Posted
Authordavid koch
Share

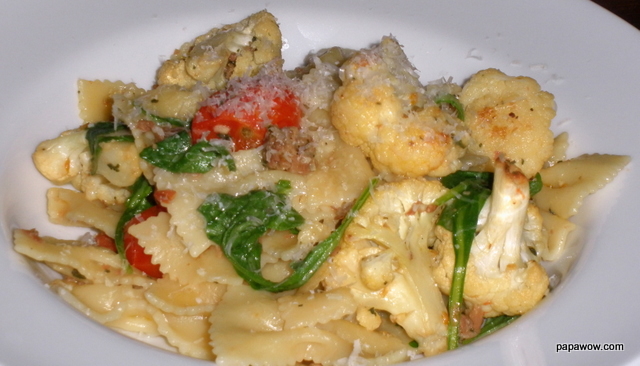
Bow-ties with Roasted Cauliflower, Arugula, and Prosciutto
An amazing dish, we utilize roasting here to concentrate the flavors of the cauliflower and tomatoes and combine it with the richness of prosciutto.  Bold flavors make this relatively light meal taste indulgent even though it could be frozen and called a Lean Cuisine. 

If you haven't had roasted cauliflower lately, you have been missing out; it becomes sweet and nutty.  The sage rounds out the dish by adding a counterpoint to the saltiness of the prosciutto and the earthiness of the vegetables.

Although this is an easy dish to make, preparation takes about an hour so make enough for leftovers because they warm great in the microwave.

Ingredients:

  • One head of cauliflower with the stem removed, cut into 2 inch pieces
  • 1 pint of grape tomatoes
  • 12 leaves of fresh sage
  • 4-5 large cloves of garlic, peeled
  • 6 slices of prosciutto, about 4 ounces
  • 1 pound of dried pasta bow-ties
  • 3/4 cup of grated Parmesan cheese
  • 6 ounces of baby arugula
  • olive oil
  • salt & black pepper


Pre-heat the oven to 400 degrees F.  In a food processor, blend the sage and garlic together for 6-7 pulses.  Add the prosciutto and blend a few more times until the mixture is uniformly chopped. Set aside.

Toss the cauliflower in 3 tablespoons of olive oil on a sheet pan along with with salt and pepper, and place in the hot oven.  After the cauliflower has been roasting for 5 minutes, removed from the oven, add the tomatoes to the sheet pan, stir well, and place back into oven.

After another 5 minutes in the oven, remove the cauliflower and tomatoes and toss them with the sage, garlic, and prosciutto mix.  Place the cauliflower and tomatoes back into the oven for another 5-7 minutes or until the cauliflower is tender.

Bring a large pot of salted water to a boil and cook the  pasta until al dente.  Drain and reserve 1/2 cup of the pasta water.  Once the cauliflower and tomatoes are done, remove them from the oven.  Place the pasta back into the pot and add the vegetable and prosciutto mixture.

Add 1/2 cup of the Parmesan cheese, the arugula, and 1/4 cup of the reserved pasta water, stir to combine.  Add additional pasta water if too dry.  Check for salt and pepper, add as needed.

Spoon into bowls and top with the remaining Parmesan cheese.  Enjoy.

Serves 4


Posted
AuthorAmy Koch
CategoriesRecipes
Share

Chelada Turkey Tacos

A Chelada is the name for the drink when you add lime and salt to a beer.  Sometimes people add hot sauce, herbs and spices, sometimes tomato juice, sometimes even Clamato.  They are also called Micheladas and what you may have gathered by now is that they're no real rules beyond salt and lime.

Well, ever since the weather started to warm up here in San Diego, we've been making more and more cheladas.  So when Honeysuckle White approached us to come up with a grilled turkey recipe, Chelada Turkey Tacos came immediately to mind.  They sent us the turkey and they even sent us a Flip HD camcorder to make videos.  Boo-yah!

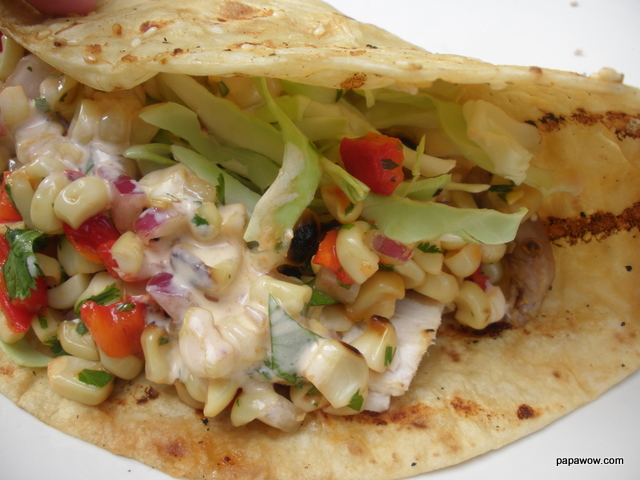
The Chelada Turkey Tacos encompass four recipes:  the Chelada brine, a Roasted Corn Salsa, the Chipotle Sour Cream Sauce, and Alfredo's Tortillas.  Make each separately and assemble them to order, grill-side, for some delicious summertime BBQ-ing. 

The morning of, we butterflied the turkey, removed the backbone, and quartered it.  This would allow for the turkey to grill more evenly since the dark meat takes slightly longer to cook than the breast.  We then made a chelada brine to season the meat and to keep the meat moist on the grill. Here is a video on how to make the Chelada Brine:

Chelada Brine from Papawow on Vimeo.

Chelada Brine

  • 32 ounces V8 or tomato juice
  • 2 beers, Mexican beer works best
  • 3/4 cup freshly squeezed lime juice plus the zest from the limes
  • 1/2 cup of salt
  • 1/4 cup of sugar
  • 1 tablespoon of dried Mexican oregano
  • 5 chipotle peppers in adobo sauce, smashed well

Once the meat has spent 2-3 hours in the brine it is ready for the grill.  Place the meat on a hot grill and cook, turning occasionally until the meat is done.  This can be anywhere between 25-45 minutes depending on the thickness of the meat and the temperature of your grill.  Turkey should be cooked to an internal temperature of 180 degrees F.

When the turkey goes on begin to roast your corn and red bell pepper for the Roasted Corn Salsa.  Go ahead and shred some cabbage and prepare the Chipotle Sour Cream Sauce also.  Make sure to keep the sour cream sauce in the fridge or cooler until it is ready to serve.

I'll be honest, the star of this recipe and the key to making them absolutely amazing is "Alfredo's" tortillas.  Alfredo was a guy in Mexico who taught my friend's father the technique of dipping the tortillas into a dressing before you grill them.  There is nothing quite like it.  

We didn't make Alfredo's exact recipe, we modified it to pair more closely with the Chelada turkey but the technique remains.  Below is our recipe and at the end of the post I will give the original Alfredo dip.

Alfredo's Dip (our version)

  • 1 cup soy sauce
  • 1 cup canola oil
  • 1/2 cup lime juice
  • 1 tablespoon sesame seeds
  • 6 cloves garlic, smashed and minced
  • 1 tablespoon seasoned salt
  • 1 teaspoon pepper

Simply dip the tortillas into Alfredo's for 2 seconds on each side before throwing them on the grill.  Cook them, turning once, for about 60 seconds a side.  Plate and fill with toppings for tacos or burritos. 

Roasted Corn Salsa

  • 2 cobs of corn, shucked and grilled until they become spotty with grill marks, the cut from the cob
  • 1 red bell pepper, grilled and diced fine
  • The juice of one lime
  • 2 tablespoons finely minced cilantro
  • Salt and pepper

Mix all of these together and set aside in a bowl.  This is a wonderful universal salsa that goes great on almost everything.


Chipotle Sour Cream Sauce (printable recipe)

  • 2 chipotle peppers in adobo sauce, smashed up fine plus 1 Tablespoon of adobo sauce
  • 1 cup sour cream
  • 1 cup plain yogurt
  • Juice of 1 lime
  • 2 teaspoons salt
  • 1 teaspoon pepper

Incorporate all of the ingredients and fill a squirt bottle with them.  You may need a funnel to fill the bottle.  Keep the sauce refrigerated or in the cooler until you are ready to eat.   

How to assemble a Chelada Turkey Taco:

How to assemble a Chelada Turkey Taco from Papawow on Vimeo.

Once the turkey is done, shred it into bite-sized pieces.  Shred some cabbage.  Dip a tortilla, grill for a minute or two, add some turkey, the cabbage, the Roasted Corn Salsa, and squirt some of the Chipotle Sour Cream Sauce on top and you have yourself a Chelada Turkey Taco!

Enjoy!

Alfredo's Original Tortilla Dipping Sauce (which is also a marinade)

  • 1 cup soy sauce
  • 1 cup corn oil
  • 1 cup fresh lime juice
  • 1 teaspoon black pepper
  • 1 teaspoon season salt
  • 1 teaspoon lemon pepper
  • 1 teaspoon sea salt
  • 1 teaspoon garlic
  • up to 1 cup sesame seeds
  • 1 teaspoons Lea & Perrin's Worcestershire Sauce
Posted
Authordavid koch
9 CommentsPost a comment
Share

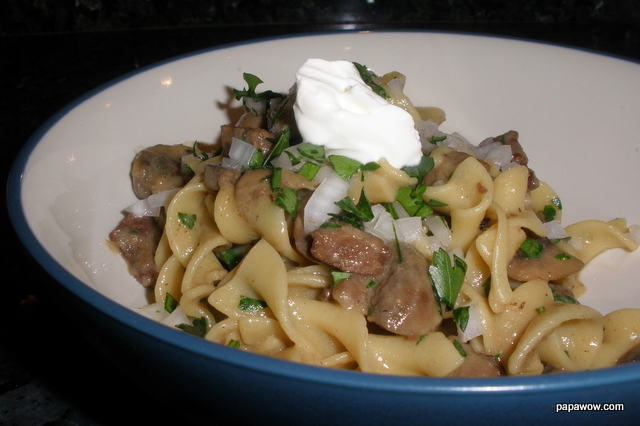
Easy Beef Stroganoff

I love this recipe.  If all Russian cuisine were this good, there'd be a borsch stand on every corner in New York City.  There are many variations of Beef Stroganoff but essentially it consists of strips or cubes of beef in a brown sauce, served over noodles or white rice.  

Use a beefy cut of steak, like chuck roast, for the most flavor.  Most recipes use mustard and sour cream although some add paprika, others garlic, and some dices dill pickle.  We added parsley and thyme.  This is comfort food at its finest.  

This takes a little bit of time, about an hour or so, but not much prep work (chopping, etc.).  As Alton Brown likes to say, "Your patience will be rewarded."  Make enough for leftovers, it stores well in the fridge and it reheats well in the microwave.  It may even be better the next day.

Easy Beef Stroganoff (printable recipe)

Ingredients: 

  • 1 pound steak, cut into 1 inch cubes
  • 1/2 large onion, diced
  • 1/3 cup dry white wine
  • 4 cups beef broth
  • 1/2 pound of button or crimini mushrooms
  • 1/3 cup sour cream
  • 1 tablespoon Dijon mustard
  • 1 teaspoon of fresh thyme, 1/2 teaspoon for dried
  • 3 tablespoons finely minced parsley
  • Salt & Pepper to taste
  • 1 tablespoon olive oil
  • 1 tablespoon of butter
  • 1/2 pound of egg noodles

Heat the olive oil in a deep-sided sauté pan on medium-high heat and add the beef.  Season the meat with a sprinkle of salt and several turns of freshly ground black pepper.  Sear the meat on all sides turning the pieces as they brown.  Remove the seared meat, set aside in a bowl, and add the onions to the pan. 

Add another pinch of salt, and a few grinds of pepper.  Cook the onions, stirring occasionally until translucent, about 6 minutes.  Add the wine and de-glaze the pan, scraping all the tasty bits off the bottom with a wooden spoon.  Allow to reduce almost completely.

Add the beef broth, the meat, and any accumulated juices from the bowl in with the onions.  Bring to a boil then lower heat and allow to simmer.

In another pan over medium heat, add a tablespoon of butter, the thyme, the mushrooms, and another couple grinds of pepper.  Allow the mushrooms to brown, about 6-8 minutes.  Once the meat is tender and the sauce is reduced, drop the noodles into boiling water to be cooked.

Fold in the mushrooms, mustard, parsley, and sour cream in with the meat and sauce.  Incorporate the egg noodles in with the sauce and serve in a bowl.

Garnish with a sprinkle more of parsley and a dollop of sour cream.  I like to add some more raw onions and a squirt of lemon juice, and although my toppings are a little unorthodox, it's delicious.

Posted
Authordavid koch
CategoriesRecipes
4 CommentsPost a comment
Share

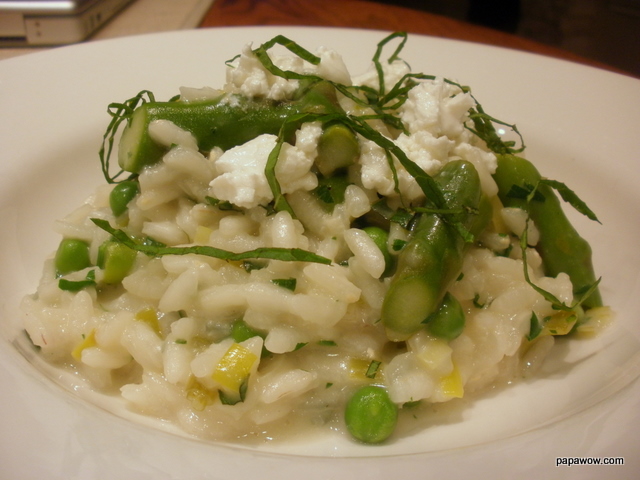
Spring Vegetable Risotto with Goat Cheese and Mint

This is a lighter, more healthful risotto featuring spring vegetables.  It doesn't take long to prepare so it is great for a weeknight meal.  The earthiness of asparagus and peas are brightened with mint.  The goat cheese rounds out the whole dish and adds some creaminess without weighing things down.

Spring Vegetable Risotto with Goat Cheese and Mint (printable recipe)

Ingredients:
  • 6 cups vegetable or chicken stock
  • 2 Tablespoons olive oil
  • 4 Tablespoons butter
  • 1 cup onion, diced
  • 1 leek, quartered lengthwise and thinly sliced 
  • 3 cloves of garlic, chopped fine
  • 1 pound arborio rice
  • 1/2 cup dry white wine
  • 1 pound asparagus, cut into 1 inch pieces
  • 1/2 cup peas - fresh or frozen
  • 4 oz goat cheese
  • 1 cup Parmesan cheese, grated
  • 1/3 cup parsley, chopped 
  • 1/4 cup mint, chiffonade
  • Salt and pepper
Directions:
In a small saucepan, warm stock on medium high heat. Once it comes to a simmer turn heat to low and keep warm.

In a large pot, heat olive oil with 2 tablespoons of butter on medium heat and add onion. Saute for 3-4 minutes or until translucent and then add leek and garlic. Saute for an additional 2-3 minutes. Add rice to pot and stir to coat in fat for 2 minutes. 

Pour in white wine and let it come to a simmer. Once wine has reduced, ladle in warm stock so it just covers rice. Stir and let simmer. As stock reduces, keep adding liquid (about 1 cup at a time). 

Once rice is almost cooked through, about 10-15 minutes, add asparagus and peas. Continue adding stock and stirring until rice and vegetables are all cooked through. Stir in remaining 2 tablespoons butter, 3 oz of goat cheese, 1/2 cup of Parmesan, parsley, and mint. 

Add salt and pepper to taste.  Serve immediately and pass remaining goat cheese and Parmesan cheese at the table for garnish.

Serves 6


Posted
AuthorAmy Koch
CategoriesRecipes
8 CommentsPost a comment
Share

Spinach and Ricotta Stuffed Crepes

My husband and I took an amazing trip to Italy a year ago where we ate and drank our way through the country. One of my favorite meals was the stuffed crepes I ordered at a small wine bar (or Enoteca) that was located next to our hotel room in Rome.

I loved it so much I went back the next day and ordered it again! Each time I go to an Italian restaurant I look for this on the menu but I am always disappointed to find it missing. Finally, I decided that I needed to recreate it myself. It wasn't identical to the Roman version but it was definitely delicious and a big hit in my household!

This dish can take some time to make so you may want to save it for the weekend. However, if you want to make it for dinner guests you can easily prepare it in advance. Just fill the crepes and keep the marinara sauce in a separate container until you are ready to bake so the crepes do not get soggy. Once the oven is preheated, ladle the sauce over, sprinkle with cheese and place in the oven.

Spinach and Ricotta Stuffed Crepes (printable recipe)

Crepes


  • 2 eggs

  • 3/4 cups milk

  • 1/2 cup water

  • 1 cup flour

  • 3 Tablespoon melted butter, plus more for cooking


Crepe Filling


  • 1 tablespoon olive oil

  • 12oz. fresh spinach

  • 3 garlic cloves

  • 1 egg

  • 15oz. package of ricotta

  • 1 cup basil, chiffonade

  • 1/3 cup Parmesan cheese, plus extra for topping

  • Salt and pepper


Marinara Sauce


  • 1 Tablespoon olive oil

  • 1/2 cup onion, finely diced

  • 3 cloves garlic, minced

  • 1 teaspoon dried oregano

  • 28oz. can of whole peeled tomatoes

  • 8oz. can of tomato sauce

  • 1 cup basil, chiffonade

  • salt & pepper


Stuffing the Crepes

Instructions:

Crepes -
Combine all the ingredients in a blender and blend for 10 seconds. Scrape down the sides and pulse one more time to ensure that all the ingredients are incorporated. Place batter in refrigerator and let sit for at least 1 hour before using.


Once crepe batter has rested, heat an 8"-10" non-stick skillet on medium heat. Add a 1 teaspoon of butter to cover the bottom of the pan, then slowly pour a small amount of batter while rolling the pan so that it coats the bottom evenly.

Let the crepe cook until it holds together and begins to turn a light golden, about 1-2 minutes then flip and cook on the other side for an additional 1 minute. Place finished crepe on a plate and repeat with remaining batter until it the batter is all used up.

This will make 8-10 crepes. Also, don't worry if your first crepe does not turn out, this is typical, just throw it out and make the next the second one...it will come out great!

The Crepes before they get sauced

Crepe Filling -
In a large sauté pan, heat olive oil over medium heat and add fresh spinach with 1/2 teaspoon salt and 1/4 teaspoon pepper, and cook until spinach has wilted. Drain liquid from spinach, coarsely chop and add to a large bowl.

Let spinach cool slightly, then add garlic, egg, ricotta, basil, parmesan and mix together. Taste for seasoning, then add additional salt and pepper as necessary.

The Crepes right before they go into the oven

Marinara Sauce -
In a large sauté pan, heat olive oil on medium heat and add onions and cook until onions become translucent, about 3-5 minutes. Add garlic and oregano and cook for an additional 1 minute.

Add in canned tomatoes and tomato sauce and bring up to a simmer while breaking up the whole tomatoes with a spoon. Alternatively, you could chop the tomatoes before adding them to the pan. Let sauce simmer on medium-low heat for 20-30 minutes, or until it sauce thickens slightly.

Add in basil then taste for seasoning adding salt and pepper as necessary.

Assemble Crepes -
Preheat oven to 400 degrees. Butter or oil a large baking dish and ladle a thin layer of marinara sauce on the bottom. Lay crepes on a flat surface and spoon about 1/4 cup of filling into each one.

Fold in the long sides then roll up like a burrito and place in baking dish. Once baking dish is full, ladle marinara sauce on the top and sprinkle with grated parmesan cheese. Bake in oven for 25-30 minutes, or until the filling is heated through and sauce is bubbly. Serve warm.

Serves 4-6

Here is a photo of the original Crepes from Rome:

Spinach and Ricotta Stuffed Crepes in Rome


Posted
AuthorAmy Koch
CategoriesRecipes
3 CommentsPost a comment
Share

Spiced Rum Banana Bread

Everywhere I look it's Banana Bread, Banana Bread, Banana Bread.  I did a check on Google Blog Search for "banana bread recipe" for the past 30 days and it turned up 34,982 results.  During the same 30 day time period, for comparison, "apple pie recipe" turned up only 15,920 and "lasagne recipe" just 11,730.

Like I said, Banana Bread is so hot right now.

I started looking more closely at these Banana Bread recipes and most left me blasé.  One idea that just my juices flowing was to add whisky.  Amy thought rum would be better.  Spiced Rum.  I agreed wholeheartedly.  Armed with a couple of spotted-ripe bananas, Chef Amy set out to develop a recipe that will get you up early on a weekend just to make some.

Without further adieu, let me ask you, "Got a little Captain in you?"

Spiced Rum Banana Bread

Bread

  • 2 cups AP flour
  • 1 1/2 tsp baking soda
  • 1/4 tsp salt
  • 1/2 cup butter, room temperature
  • 1/2 cup brown sugar
  • 1/2 cup granulated sugar
  • 2 eggs
  • 1 cup bananas, smashed
  • 1/4 cup applesauce
  • 1/4 cup spiced rum (We used Captain Morgans)
  • 1/2 tsp vanilla
  • 3/4 cup pecans or walnuts, chopped


Rum Glaze

  • 1/4 cup butter
  • 1/4 cup brown sugar
  • 1/4 cup white sugar
  • 2 tablespoons spiced rum
  • 2 tablespoons water
  • 2 tablespoons pecans or walnuts to garnish, chopped


Preheat oven to 350 degrees.

Butter and flour a bundt pan and set aside.

In a large bowl sift together flour, baking soda, and salt. Set aside.

In a mixer, cream together butter and both sugars until smooth. Mix in eggs one at a time until incorporated. Take bowl off mixer and stir in the bananas, applesauce, rum, and vanilla. Fold in the dry ingredients into the wet being careful not too over mix.

Fold in chopped nuts. Scrape batter into a prepared bundt pan and bake for 40-50 minutes or until a toothpick comes out clean. Let cool for 10 minutes before turning out onto a large plate. Make glaze.

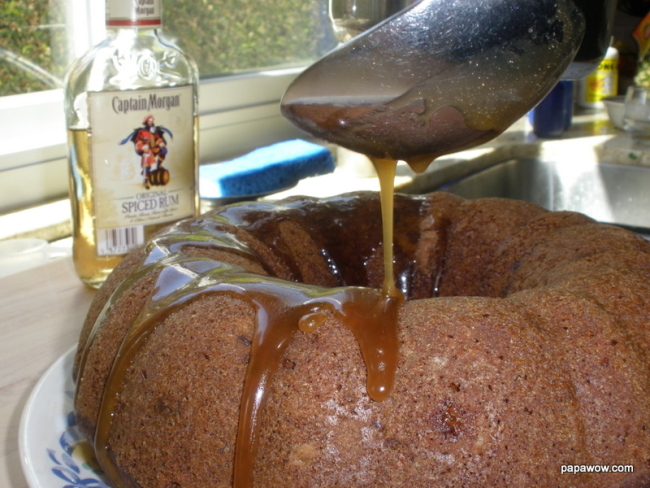
Captain Morgan's Spiced Rum Glaze

Glaze:
In a small saucepan, combine butter, sugars, rum and water. Bring to a boil, lower heat and let simmer for 3-5 minutes or until it thickens slightly. Let cool for a few minutes then pour glaze over the top and sprinkle with chopped nuts. Slice and serve.

Serve Spiced Rum Banana Bread with Fruit and Mimosas

Posted
AuthorDave and Amy Koch
CategoriesBaking, Recipes
7 CommentsPost a comment
Share

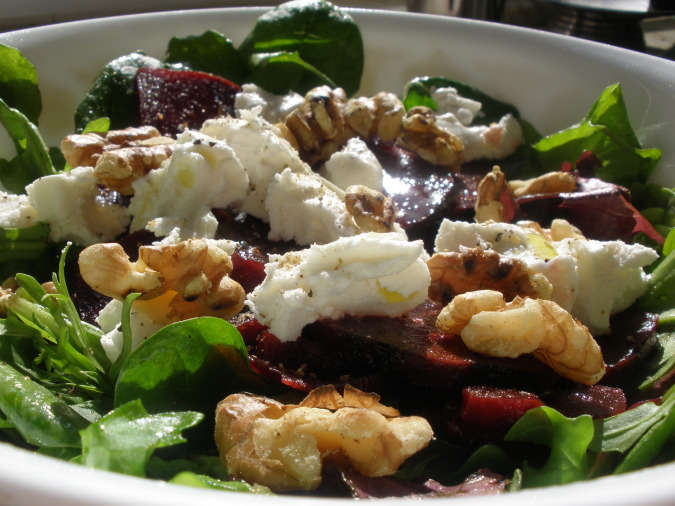
Spinach Salad with Beets, Walnuts, and Goat Cheese

Green, brown, white, and deep crimson.  The colors scream to be consumed.  We threw this together to accompany a pasta dish on a sunny Sunday but this salad is so hearty it could also be a weeknight meal.  We cheated by using Trader Joe's vacuum packed pre-cooked beets, but you could roast your own easily in about 45 minutes (technique below).

Use a basic balsamic vinaigrette to accent the flavors and not overpower them.  Balsamic vinegar, honey, mustard, salt, and pepper do the trick nicely.  Lightly toast the walnuts in a dry skillet.  Open the bag of spinach and dress the leaves.  Slice the beets thin and place on the greens.  Drop gobs of goat cheese, and I like to finish with more fresh ground black pepper and a drizzle of olive oil.

If you want to roast your own beets.  Preheat the oven to 400 degrees F.  Cut the greens off about an inch over the bulb, wash very carefully as they are often quite sandy.  Rub some olive oil all over them and either fold up into an aluminum foil pouch and/or place on foil-lined baking sheet.  Roast for 45 minutes.  Remove the skin, it skin should come off easily under running water.

If you want to make your own cheese, read a book.

If you ever get red pee after eating beets, like I do, don't be alarmed.  Not only is it relatively common, but they have a name for it, Beeturia.  There is some evidence to suggest it may be more prevalent in individuals with iron deficiency but they also think that the specific gut flora plays an uncertain role.  Well, now you know.

Posted
Authordavid koch
CategoriesRecipes
4 CommentsPost a comment
Share

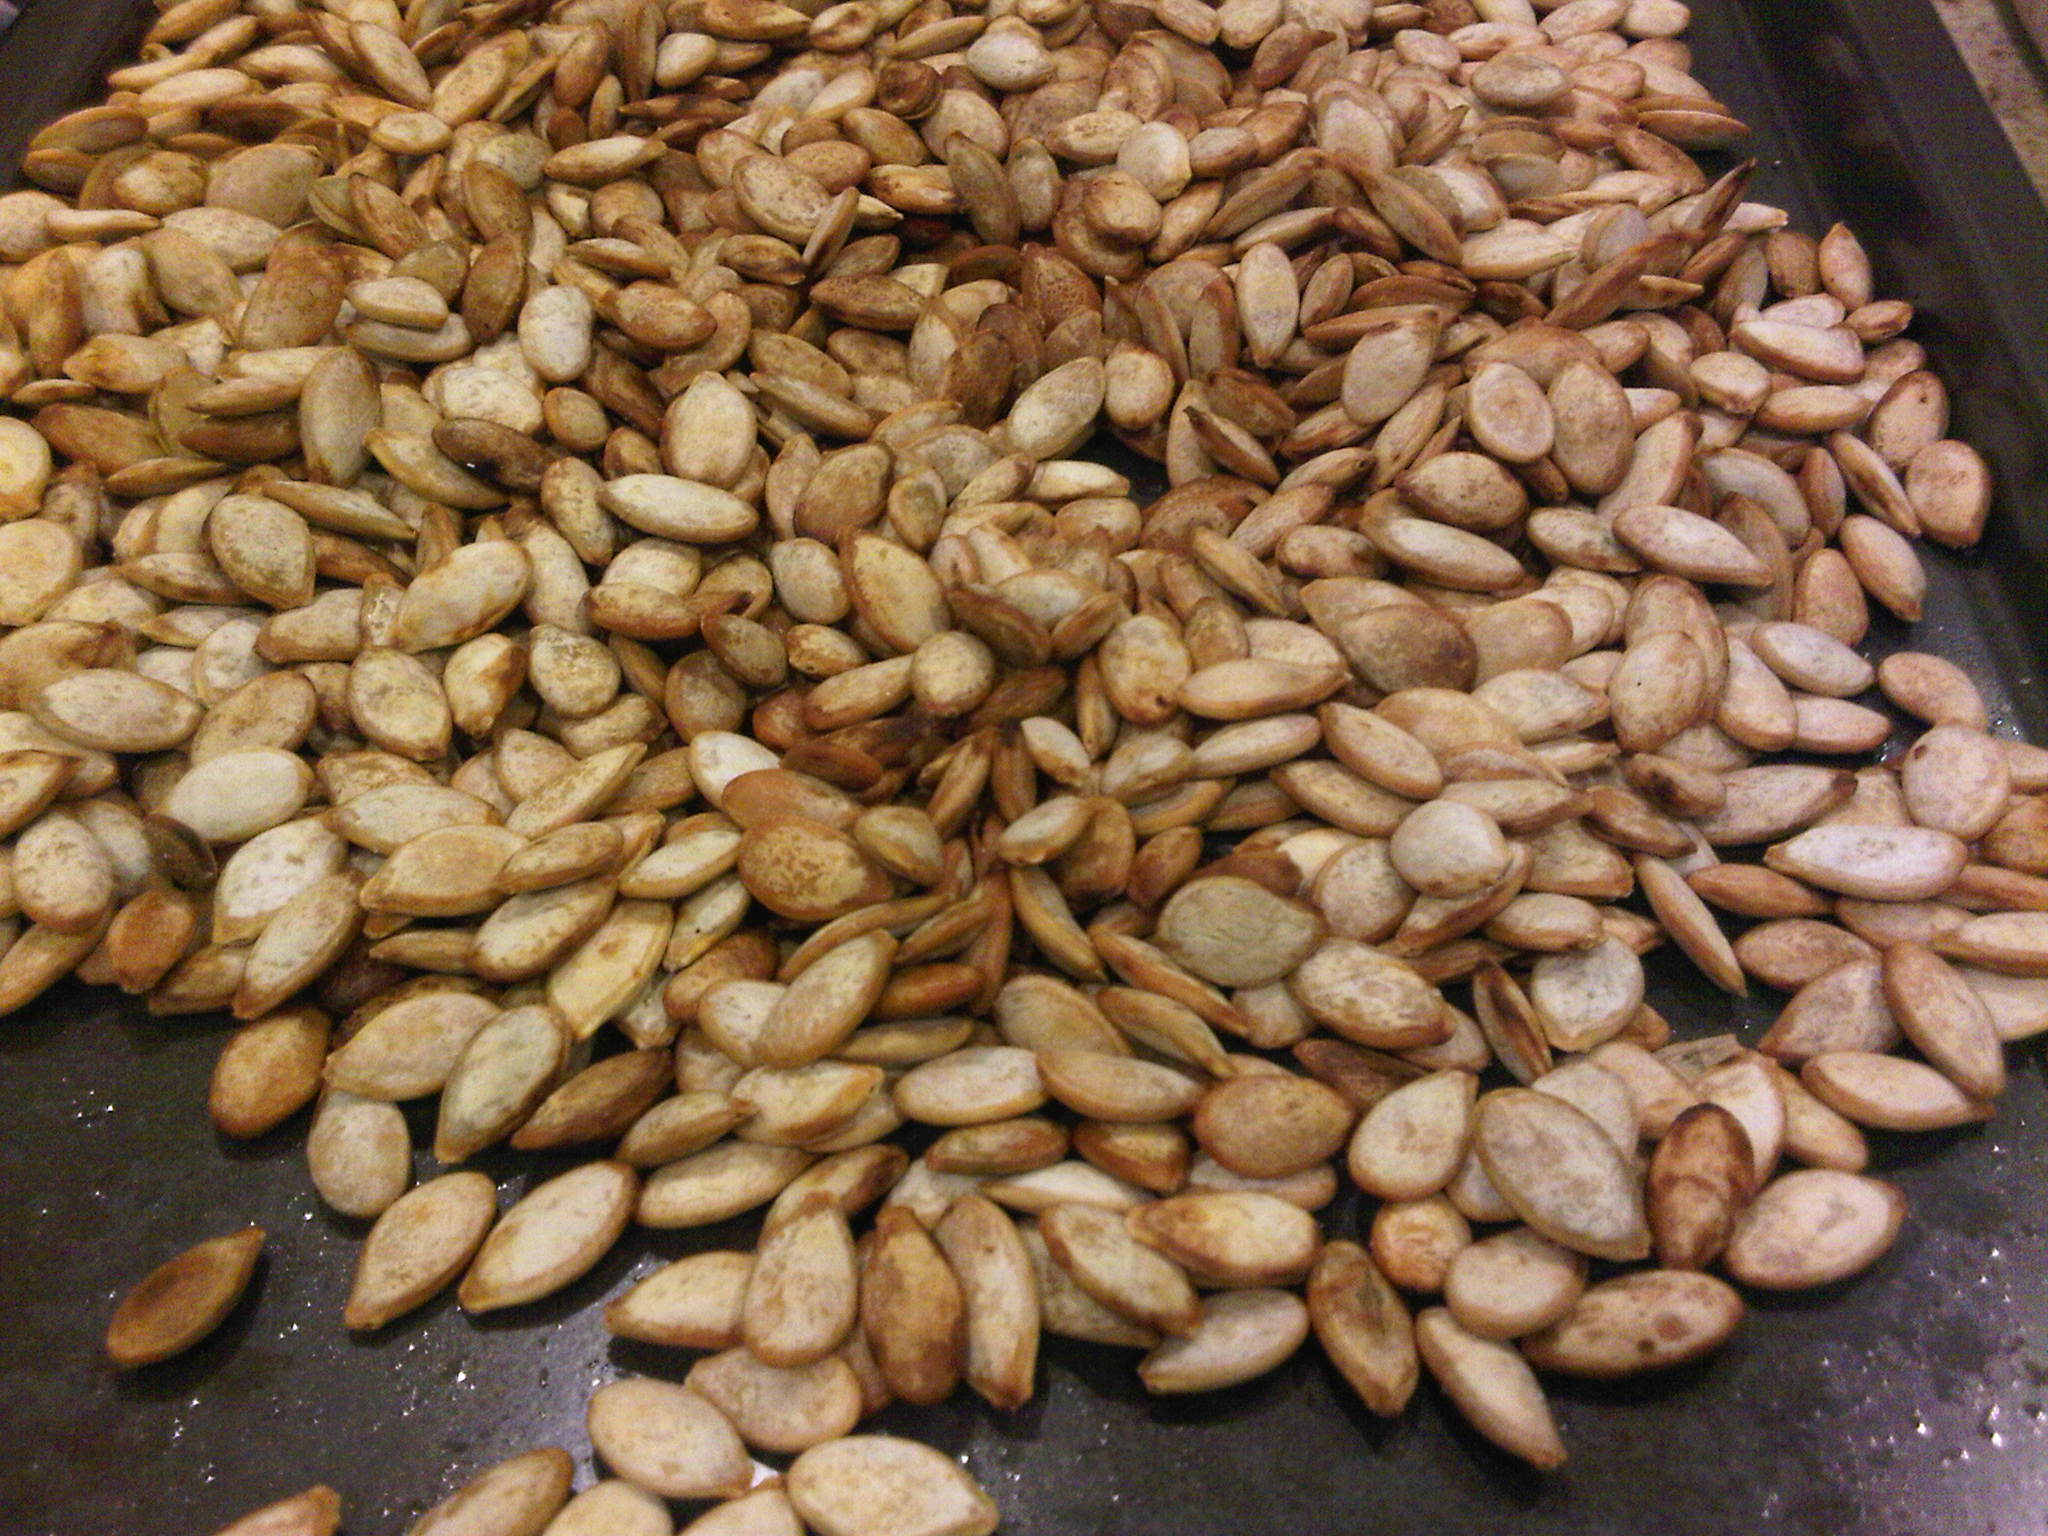
Home made Roasted Pumpkin Seeds

My mother in-law roasts fresh pumpkin seeds on a regular basis.  Almost weekly.  They are a wonderful snack; delicious, healthful, and have an amazing crunch.  I asked her recently how she makes them because I wasn't seeing piles of pumpkin carcasses laying around everywhere.

She simply uses the ones from Trader Joes, tosses them in a little olive oil, and roasts them at 350 degrees until they begin to pop, about 15 minutes.  She uses Trader Joe's brand because they are not too salty.

If you can only get your hands on David's pumpkin seeds (and you can, they're ubiquitous, they're even at 7-11).  You'll need to soak them in water for about 10 minutes to remove most of the salt.  I've had them before and they are unpalatable.  They then will need to be dried with paper towels and roasted longer as well.

Once they come out of the oven, add salt as needed.  Let them cool, and store them in an air tight container.  They'll keep for weeks.

I thought it was interesting to read David's nutritional facts.  Besides showing they are high in zinc, iron, and magnesium, I was baffled they that they only stated 10mg of sodium.  "But they're indelibly salty," I protested in my head. Who do they think they are?

I also noticed they only showed 1g of fiber per 30 gram serving.  What gives?  Pumpking seeds are mostly fiber!

Eureka!  At the bottom of the facts, it states, "Nutrition facts are for the Pumpkin Seed Kernal.  Eating the shell as well would bring the sodium total to 940mg (39% Daily Value)" - Unfortunately, they fail to mention that it would also bring the fiber total to a whopping 10 grams!

Americans don't eat enough fiber.  Eat more pumpkin seeds.

Posted
Authordavid koch
CategoriesRecipes
2 CommentsPost a comment
Share
Gaucho Chili Verde

This recipe has nothing really to do with Argentinian Cowboys (Gauchos) except for the fact that UCSB's Basketball team made it to the Big West finals last Saturday and we don't get to celebrate sports very often.  UCSB is most known in sports for throwing tortillas at games, not winning them.  We decided at the last minute to have some friends to cheer them on over and make a big pot of Chili Verde.

This is a great dish for entertaining because it is A) relatively inexpensive B) can sit on the stove for hours and be served from its cooking vessel C) is freaking delicious.  We served it with some Mexican rice, a black bean salad, tortillas, and a bunch of fixin's... beer too, obviously.  This is a crowd of Gauchos after all.

The Verde (green, in Spanish) must have brought out the luck of the Irish because UCSB triumphed over Long Beach State and we're going to March Madness!  We're going to need a lot more than luck this Friday the 19th, unfortunately, to make it past Ohio State who is favored by 17 points.  We may need a truck full of tortillas too.


The recipe was adapted from Joanne Weir's recipe Slow Braised Pork in her book Tequila.  Among other changes, we omitted the tequila because there were some pregnant ladies running around.  Feel free replace a 1/2 cup of water with a 1/2 cup of tequila

Ingredients:
  • 2 tablespoons vegetable oil
  • 3 pounds boneless pork shoulder, cut into 2 large pieces
  • Salt and freshly ground black pepper
  • 1 yellow onion, chopped
  • 2 small green bell pepper, seeded and chopped
  • 3 jalapeños, seeded and minced
  • 6 cloves garlic, minced
  • 1 tablespoon ground cumin
  • 1/2 teaspoon dried oregano
  • 3 cups chopped tomatillos (fresh or canned)
  • 2 cups water
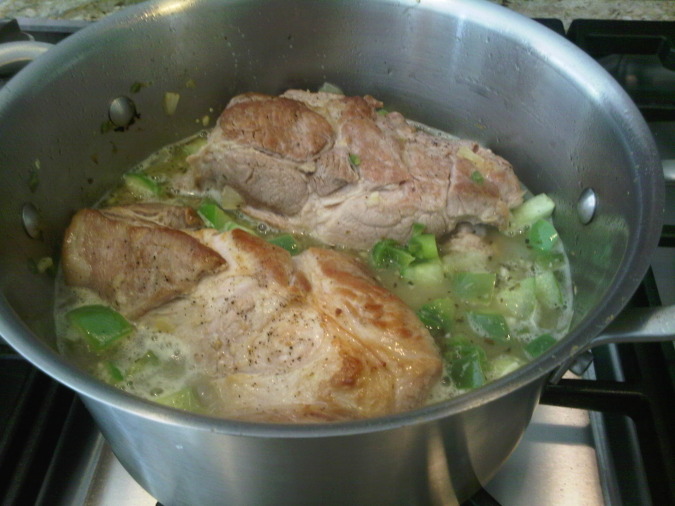
Heat the oil in a large, heavy pot over medium-high heat.  Make sure it is one that you have a lid for.  Season the pork well with salt and pepper.  Add the pork to the pot and sear until golden brown on all sides, about 10 minutes total.  Remove the pork from the pan, reduce the heat to medium-low, add the onion, bell pepper, and jalapeños.

Cook everything, stirring occasionally, until the vegetables are soft, 10 to 12 minutes.  Add the garlic, cumin, and oregano tomatillos, water, and pork and bring everything to a boil. Reduce the heat to low and simmer, covered, until the pork is very tender, about 1-2 hours. 

Take the lid off, remove the pork, increase the heat to medium, and simmer until the sauce thickens.  Shred the pork with a pair of forks and add it back to the pot.  Served with warmed corn tortillas and accoutrement like sour cream, chopped cilantro, hot sauce, avocado, chopped scallions, and diced onions. 
Posted
AuthorDave and Amy Koch
CategoriesRecipes
3 CommentsPost a comment
Share

Putting the Muff in Muffaletta

Every 5 or so years, the Sports Gods look down from that sports bar in the sky and bless us with a great theme for the greatest food/sports combo know to man: The Super Bowl. New York is playing? Sausage and Peppers, Pizza. The Niners? Crab artichoke dip. Miami? Cubanos. Dallas or KC? BBQ.

You can count on the great city of New Orleans hosting the Big Game every 5 years or so, but this year, the year of our lord 2010, the often down-trodden yet extremely loveable Saints are actually playing in the Big Game, hopefully giving this great City a much deserved and karmically fitting championship.

What this means is an excuse to roll even harder with Etouffee, Gumbo, Po-Boys, Beingnets (sweet and/or savory), Jambalaya, Abita Beer, Hurricanes, Blackened Gator, fatty gulf oysters, beads, titties, the whole nine yards.  In honor of this city that had given so much to the global culinary landscape, today I choose to honor the Crescent City's Sicilian ancestry with a classic NOLA nugget, the Muffaletta.

How can anyone not love a something called a Muffaletta? Then when one realizes that this a briny delight of freshly baked bread, cured meats, provolone and some type of olive relish, we know that we truly have something special here.

For more history on this sandwich and where to indulge in one of every in the Big Easy, click here. I've eaten the famed sando at the Central Market and I'm pretty sure I can do it better. Yeah.


Making Muffaletta

Matt's Muffaletta:
Serves several.
Homemade Foccacia (by all means, store bought is fine, as is Ciabatta loaf or really and quality artisan loaf from a good source):

1 envelope (1/4-ounce) active dry yeast 
1 tablespoon sugar
1 teaspoon garlic salt
1/4 cup plus 3 tablespoons olive oil
1 cup warm water (about 110 degrees F.)
1 teaspoon salt
3 1/2 cups all-purpose flour
3 tablespoons Kosher salt
2 tablespoons sesame seeds

Using an electric mixer with a dough hook, whisk the yeast, sugar, garlic, 2 tablespoons of the olive oil, warm water, and caramelized onions together for 2 minutes to dissolve the yeast. Add the salt and flour. With the mixer on low, mix until the dough starts to come together.

Increase the speed to medium-high and mix until the dough comes away from the sides of the bowl and crawls up the dough hook. Grease a mixing bowl with 1 teaspoon of the oil. Place the dough in the greased bowl and turn once. Cover the bowl with plastic wrap and place in a warm, draft free place until the dough doubles in size about 1 1/2 hours.

Grease a half baking sheet pan (17 by 12) with 2 teaspoons of the oil. Turn the dough out onto a baking sheet. Punch the dough down and press the dough out to form the pan. Brush the dough with remaining 1/4 cup of the olive oil. Sprinkle the dough with kosher salt and sesame seeds.

Lightly cover the pan with plastic wrap and let the dough rest for 1 hour. Bake the dough for 30 to 35 minutes or until the dough is golden brown. 


Mixing Muffaletta

Olive Relish:

1 pint assorted olives from the olive bar - get pitted - it will save time. I also took a few marinated mushrooms because that's how I roll.
1 jar (12oz) roasted red peppers
1 jar (6.5 oz) marinted artichoke hearts
10-15 pepperoncinis
Generous pinch dried oregano

Small chop all ingredients, combine and let sit for at least 2 hours at room temperature or overnight in the fridge. Bring to room temperature before assembling sando.

Meats & Cheeses:

1/2 lb Provolone
1/2 lb Mortadella
1/2 lb prosciutto
1/2 lb Salame Toscano


Setting up the Muffaletta

Assembly:

Whatever bread you've chosen to use, slice it and stack your meats/cheeses/olive. It's not rocket science - you're making a sandwich. I prefer a layering technique - mortadella, cheese, spread, proscuitto, spread, cheese, salame, cheese, so the cross section looks more interesting.

After the meats, cheeses and olive salad are looking pretty, wrap your muff in plastic wrapand let sit for another hour before slicing.

Go Saints!!!!!!! 

Posted
AuthorMatt Haas
CategoriesRecipes
Share

I'm a big fan of soups.  They are usually easy.  They can be done quickly.  They are often cheap.  Who doesn't like cheap, fast, and easy?  Only communists.  That's who.  

This "Tortilla" Soup only requires about 30 minutes when you use one of those pre-cooked chickens from the supermarket.  I always stock onions, carrots, and celery and this whole thing, albeit delicious, was an afterthought.

Ingredients:

A half an onion, one rib of celery, a large carrot, salt, pepper, oil, cumin, coriander, paprika, chicken, and water - oh yea, and tortilla chips.  A knife, a pot, and a

Posted
Authordavid koch
CategoriesRecipes
3 CommentsPost a comment
Share

Wow!  I don't think Rachael Ray herself could have thought of a lame-er name for a recipe, I'm gloating.  With such a poor choice of words constructing a name for this pumpkin bread, it does taste quite delicious.  The recipe filled up a small baking pan and a muffin tin.  Dan and Heather were stoked that we had extra.

I got the starter recipe from the Downeast Maine Pumpkin Bread recipe at allrecipies.comI can't bake to save my life so there will always be a starter recipe when it comes to flour, egg, sugar, etc...

The instructions were followed more-or-less with the following minor changes:

1) I didn't have a full cup of vegetable oil so

Posted
Authordavid koch
CategoriesRecipes
4 CommentsPost a comment
Share

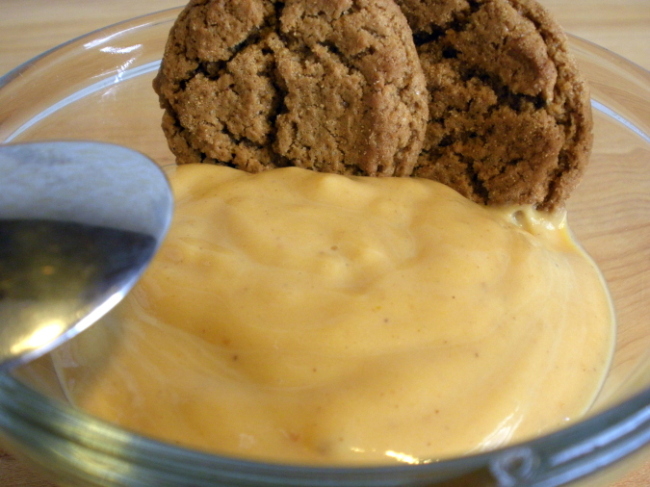
A little background is necessary to explain this.  I'm a HUGE fan of Alton Brown's Tofu Mousse Pie; it's easy, it's pretty healthful, it's chocolate, and it's delicious.  What more do you want?  A holiday variation?  Well, that's where I got the idea.

Disclaimer:  This is not the most delicious dessert I've ever made.  With that being said, it is still healthful, easy, inexpensive, and not that bad.  If you like Pumpkin Pie, this is similar and is a drop in the bucket in comparing their prep times.  You should have not problem giving the kiddies seconds of this stuff, it is low in sugar, high in protein, and packs a wallop of vitamin A.

One could crumble some ginger snaps

Posted
Authordavid koch
CategoriesRecipes
2 CommentsPost a comment
Share

OK, so they aren't very scary but it is Halloween and Simple Ginger Snaps doesn't sound very cool.  I adapted the recipe from Brown Eyed Baker sans the molasses because we didn't have any in the "test kitchen."  I also added Black Pepper and Grains of Paradise to make them a little more spicy and savory.

I recently purchased a second pepper mill and some Grains of Paradise and I have been experimenting with them.  The little known spice is reminiscent of black pepper but also lends a pie-spice nuance that I thought would go well with

Posted
Authordavid koch
2 CommentsPost a comment
Share

Braised Beef Ragu

This dish is amazing, There is such depth of flavor that each bite takes you to the streets of Rome, sans motorscooters of course.  The texture of the shredded beef stands up well with the bite of al dente Campanelle.  By puréeing the mushrooms and the panchetta the richness of each is multiplied.

We got this recipe from Joanne Weir which she calls Braised Beef in Two Courses but we only made the first course here, the pasta course.  It is a little bit more work than your standard pasta dish but well worth the effort.  Spend a little time on a Sunday afternoon and make enough to take to work for lunch on Monday.

Your labor will be rewarded.

Ingredients:

  • 1/2 ounce dried porcini mushrooms
  • 1 tablespoon olive oil
  • 3 pounds beef chuck
  • Salt and freshly ground black pepper
  • 3 ounces pancetta, diced
  • 1 carrot, finely diced
  • 2 stalks celery, finely diced
  • 1 medium yellow onion, finely diced
  • 5 cloves garlic, minced
  • 1/2 cup tomato paste
  • 2 teaspoons sugar
  • 3 cups peeled, seeded and diced tomatoes, canned
  • 1 pound pasta, we used campanelle
  • Freshly grated Parmigiano Reggiano


Directions:

Pour 4 cups boiling water over the dried porcini mushrooms and let sit until the water is cool.

Heat the olive oil in a large pot or heavy casserole over medium-high heat. Season the meat well with salt and pepper and brown the meat, turning occasionally, until browned on both sides, about 10 minutes. Remove the meat from the pan and set aside.

Add the pancetta to the pan and stirring occasionally  cook until golden, about 10 minutes. Add the carrots, celery, and onions to the pan and cook until they begin to soften, about 15 minutes. Strain the porcini and reserve the liquid. Add the revived porcini mushrooms and the garlic to the pan.

In a large bowl, combine the tomato paste, sugar, porcini soaking liquid and tomatoes. Increase the heat to high, add the tomato mixture and add the meat back into the pan. Bring to a boil, reduce the heat to low and simmer, uncovered, turning the meat occasionally, until the meat is tender and falling apart, 2 1/2 to 3 hours.  You could also place the meat in a 350 degree oven.

If the sauce thickens too much, add water.  Remove the meat from the pan and cover with foil. Purée the sauce in a blender until it is smooth. Season with salt and pepper.

Cook the pasta in boiling salted water until tender. Toss the pasta with as much sauce as needed. Serve with the grated Parmigiano Reggiano.

Bon Appétit!


Posted
AuthorDave and Amy Koch
CategoriesRecipes
6 CommentsPost a comment
Share