"Jack and Jill went up the hill, each with a buck and a quarter.  Jill came down with Frittata..."

Oh... the magical vanishing act of the Frittata, making all those vegetables in the refrigerator disappear.  With only four eggs, I was able to vanquish nearly a whole Bell Pepper, two handfuls of Spinach, a quarter of an Onion, a small army of chives, four ounces of Jack Cheese, and a handful of Flat-Leaf Parsley.

A Frittata gives you the opportunity to use those, let's say less-than-perfect remnants of your vegetable drawer.  You stick to a theme and bind everything together literally with eggs.  The only prerequisites are the eggs, really - although I would never consider making one without...

Posted
Authordavid koch
CategoriesRecipes
2 CommentsPost a comment
Share

This is a take on a traditional Caprese salad but with 4 different types of tomatoes and the addition of Lemon Cucumbers.  Everything was given to us from our friend's garden (thank you Heather and Steve!), except the Mozzarella, thus the name Summer Garden Salad.  If Lemon Cucumbers are not available...

Posted
Authordavid koch
CategoriesRecipes
3 CommentsPost a comment
Share

What are these little green sprigs?  Sea Beans?  A Sea Bean is the salty, succulent plant called Salicornia that is also sometimes called glasswort, pickleweed, and marsh samphire (I grew up calling Carpobrotus edulis "Ice Plant" pickleweed, but then again, my parents are no Botanists.)  True Sea Beans appear during the summer at farmer's markets and specialty food shops for a few weeks and they only last a few days once picked, so eat them as soon as you buy them.

Sea beans have great crunch that bursts a blast of brine when chewed.  They taste just like a day at the beach - really, their resemblance to the sea is uncanny.  Because they are so salty,

Posted
Authordavid koch
Share

photo by Amy Koch

I was at a friend's house for dinner and we were planning to make some stuffed figs as an appetizer... but upon returning from the store we realized we had forgot to buy the figs.  We looked around the kitchen to see what else we could use.  There were some perfectly ripe peaches in my friend's fruit bowl which I thought would compliment the saltiness of the prosciutto perfectly...

Posted
AuthorAmy Koch
CategoriesRecipes
4 CommentsPost a comment
Share

Spanish Almond Soup

I first heard of Almond Soup on Evan Kleinman's radio show/podcast Good Food.  She and her guest talked about Ajo Blanco - a kind of gazpacho from southern Spain.  I thought, "cool, I was wondering what I was going to do with all those raw almonds that I just I bought..."

I dug around a little bit online to find a recipe; searching "spanish almond soup" I found a theme, grasped some basic ratios, and set out on making it my soup, albiet not Ajo Blanco.  Garlic, saffron, and bread or bread crumbs were present in all of them.  Besides those, some had cumin, some had milk, some had vinegar, some even had cinnamon.

In full disclosure and truthiness, three of the recipes I found were completely identical: the one from costadelsol-vacationrentals.com, from ezinearticles.com, and also eatmoreherbs.com.  They all started with, "Heat the oil and toast the almonds, garlic, bread and saffron.  When golden brown set a few..." and completed the recipe verbatim.  I wonder who got screwed.

In any case, this is what I came up with.  The key is blending the Jiminy Cricket out of it and running it through a strainer.  The yield is less but the result is not nearly as grainy.  Almonds don't break down under heat like, say, peanuts or other legumes will.


Ingredients:

  • 2 tablespoons olive oil
  • 1 cup almonds
  • 2 cloves garlic
  • 1 pinch of saffron
  • 1 cup fresh flat-leaved parsley, chopped
  • 2 tablespoons of breadcrumbs
  • 1 teaspoon of cumin
  • 8 cups of chicken or vegetable stock
  • the juice of 1 lemon


Technique:

Heat the almonds and garlic over medium-high heat with the olive oil for about 3-4 minutes, just until the garlic develops a little color and the almonds become fragrant.  In another pot, bring the 6 cups of stock to a simmer.

Add the saffron, cumin, and breadcrumbs to the almond mixture and begin to stir them well.  This will bloom the flavor of the cumin and saffron and cook any raw flavor out of the breadcrumbs - about another minute. 

Add 2 cups of the stock to the pan to deglaze, bring back to a simmer, then transfer the mixture to a blender.  Add the chopped parsley, salt, and pepper.  Blend thoroughly, 2-3 minutes.

Pour the blended almond mixture through a strainer into the simmering stock.  Add the lemon juice, check the seasoning and serve hot.

You can garnish with slivered almonds, and a pinch of the parsley.


Notes:

I used raw, unsalted almonds.  I'm sure you can use roasted and/or salted you simply would not need to cook them as long, and adjust the salt accordingly.  I would also not recommend an emersion blender, they wouldn't be able to break down whole almonds like a good 'ole stand blender can.


Posted
Authordavid koch
CategoriesRecipes
4 CommentsPost a comment
Share

How about a fancy-pants twist on a summer favorite?  OK, it's not THAT fancy, but it isn't much more difficult than making a normal mojito and it adds a nice little kick.  Yes, you could just add more rum if you want a kick... so why not add more rum and the ginger too?

Obviously only fresh mint and ginger will do.  Unfortunately, ginger comes in pesky little shapes and can be difficult to remove the skin.  If you peel it with a spoon you can eliminate the risk of slicing your finger. 

Garnish these little firecrackers with a lime wedge or a slice of ginger.  Make a slit with a sharp knife and hang it from the rim.

Make a mojito as you normally would:

  •  a small bunch of fresh mint leaves, about 6-7
  • half a lime, cut into 4 wedges
  • 1-2 teaspoons of sugar
  • 3-4 sugar cube-sized chunks of fresh ginger
  • 1.5-2 ounces white or light rum
  • ice
  • top everything off with soda/seltzer water


Directions:

Put the mint, lime, sugar, and ginger into a tumbler.  Muddle everything together with a... muddler! (seriously, you can't make a proper mojito without one). 

Add the rum, ice, and top the glass with seltzer water.  I like to munch the mint as I go, it freshens your breath; and besides, spitting the little bits back into your glass every time you take a sip is uncouth.

Done.


Here is a great video from Epicurious on how to make a "proper" Mojito; a la one that you would find in a nice bar.


Posted
Authordavid koch
CategoriesDrinks, Recipes
Share

Making homemade ricotta is incredibly easy, relatively quick (30-45 minutes), and requires literally no skill whatsoever.  It is, on the other hand, a huge crowd pleaser - and if you tell everyone, "it is quite a process," you can impress them with your dark knowledge of the culinary witchcraft called cheesemaking.

Begin with a half gallon of whole milk and a half-quart of buttermilk in a large cold pot.  Turn heat up to high and constantly stir with a heat-proof rubber spatula or wooden spoon.  While stirring, be sure to continually scrape the bottom of the pan so that the milk does not scorch. 


When the milk/buttermilk mixture comes to about 180 degrees F, curds will begin to form on the surface.  At this point, stop stirring for one minute to allow them to separate from the whey.  Remove from heat.


Line a sieve with cheesecloth and gently scoop curds into the cloth to allow to drain.  Do not push down or squeeze.  One method to allow the ricotta to drain is to tie the cheesecloth into a bundle and then to a wooden spoon suspended over a pot (see below).


Drain for 15-30 minutes.  Gently remove ricotta from cloth and salt to taste. 

One simple and delicious appetizer to make with your homemade ricotta is to add fresh herbs like rosemary, thyme, parsley, chives, and/or lemon zest.  Place it in a bowl and next to a plate of crostini (that's a fancy name for toast) so that you can spread it on yourself.

Get the kids involved and show them that cooking can be magic, making a solid cheese from liquid milk.

Enjoy.

Posted
AuthorDave and Amy Koch
CategoriesRecipes
Share


This Creamy Collard Greens and Roasted Garlic Soup is a hearty soup with the addition of potatoes and cream.  It takes about an hour and requires only an emersion blender, an oven, and a stove.  It makes for a completely satisfying entrée with a little bread or toast as a side.  I garnished it here with a dollop of sour cream, a drizzle of olive oil, and a dusting of paprika.


Ingredients:

  • 1 pound of medium-starch potatoes, like Red or Yukon Gold, roughly chopped
  • 1 pound of carrots, roughly chopped
  • 1 pound of collard greens, washed well, and roughly chopped
  • 1/2 pound of asparagus
  • 1/2 onion, roughly chopped
  • 1 quart of chicken or vegetable stock
  • 1 bulb of garlic, roasted
  • 1 cup cream
  • Salt & pepper to taste


Directions:

Pre-heat the oven to 350.  Slice bulb of garlic in half into a cross-section, rub with olive oil, salt & pepper, and place into the hot oven for about 30 minutes until it browns lightly.  While that is roasting, wash and chop all your vegetables.  Ensure the greens get a good soak, they tend to have a lot of grit on them when you get them from the store.

Bring a large pot to medium-high heat, add 1 tablespoon of olive oil, the carrots, asparagus, and onions, salt & pepper, and sauté for 2-3 minutes.  Then add the stock and potatoes, bring to a boil, then turn the temperature down to a simmer and cover.  Cook until the potatoes until they're soft and yield easily to being pricked with a knife, about 15-20 minutes.

Once you have removed the roasted garlic from the oven, squeeze it so that the cloves slide out.  They should have the consistency of pudding at this point and should slide out easily.  Drop them into the pot along with the collard greens and bring back to a boil, hold them at a boil for 5 minutes.

Once the greens have had time to soften, take the pot off the heat and blend thoroughly with an emersion/stick blender, or in batches in a traditional blender.  Once everything is blended, taste to see if you need more salt & pepper, and add the cream.  Mix well.

Serve hot and garnish with sour cream and/or a little olive oil, and a sprinkle of paprika.  Enjoy.


Posted
Authordavid koch
CategoriesRecipes
4 CommentsPost a comment
Share

What's a 49er BBQ?

A 49er BBQ is something you can whip up in a small apartment on a foggy day with an electric stove from the 1960s and still have people second guess if it was done on a grill or not. Well, they'll know there wasn't a grill, but it'll be delicious nonetheless.

We made pork spareribs, pinquito beans, and Southern greens on a recent lazy Sunday.

The ribs are done using a technique I learned from Alton Brown. The pinquito beans are, more or less, Santa Maria BBQ style. The greens I kept Southern.

The ribs and the beans take at least 2-3 hours but the greens, once prepped, only take 5-10 minutes to cook - so plan accordingly. I started the beans with a "short-cook method," since I didn't soak the dried beans overnight, they needed to be par-cooked. Then, I made the dry rub and got the ribs into the oven. Last, I prepped the greens and put them aside to finish.


THE RIBS

  • 1 slab of pork spare ribs
  • 1 Tablespoon chili powder
  • 1 Tablespoon smoked paprika
  • 1 Tablespoon ground black pepper
  • 1 Teaspoon sugar
  • 1 Teaspoon mustard powder
  • 1 teaspoon ground cumon
  • 1 Teaspoon ground coriander
  • 1 Teaspoon garlic powder
  • 3 Tablespoon kosher salt


Preheat oven to 275 degrees. Trim fat from ribs thoroughly; these will be done in the oven and excess fat will not render as if it were on a grill. Lay out 2 sheets of aluminum foil, each of which are 8 inches longer than the spareribs. Lay the 2 sheets of foil on your workspace to make 1 extra wide piece of foil. Overlap an inch from each piece and crimp several times to form a tight seal. Place the ribs in the middle. Combine spices in a bowl, then generously rub across the ribs. Don't forget to get both sides.

Fold up the top and bottom of the foil together and crimp in the same fashion for a seal. Do the same with either side. You should have a tight 'bag' made from aluminium foil. Place on a baking sheet for easier transportation and in case of spillage. Place into the oven for 2 hours. Check after 2 hours for done-ness; gently unfurl the foil sides. A bone should rotate easily around the meat, indicating that everything is tender. If not, place back into the oven and check again after 15 minute increments.

Once ribs are soft, open of the foil so that they are exposed and turn the oven to broil. Baste the top of the ribs several times with the juices in the bottom of the baking sheet using a pastry brush. Watch closely because they will burn quickly; this will take about 5 minutes. When a good crust is formed, pull from the oven, close up the foir around them, and let them rest for at least 5 minutes before slicing.


THE BEANS

  • 1/2 pound of dried pinquito beans, also called pink beans
  • 1 teaspoon of powered mustard
  • 2 tablespoon of brown sugar
  • 3 cloves garlic
  • 1/2 yellow onion, minced
  • 1 tablespoon salt
  • 1 tablespoon tomato paste
  • 1 teaspoon of ground black pepper
  • 1 teaspoon of chili sauce (I used Srirachi)
  • 1/2 jalapeno (I like it spicy, but you can omit this)


Sort the dried beans on a plate or baking sheet to remove any stones.  Soak the beans in water overnight if you can.  If you are not able to soak, place the beans into a large pot, add a gallon of water [or so] and bring it to to a boil.  Kill the heat, cover, and allow to sit for an hour.  This is called the "short-cook method."


Drain the liquid once complete and continue with the recipe. Once you have soaked or done the "short-cook method" with the beans, add them into a pot and add enough water to cover them by one inch.   Add the rest of your ingredients. 

Simmer uncovered until the beans are soft, about an hour.  The level of liquid should be kept flush with the height of the beans, add water as needed.


THE GREENS

1 pound of leafy greens: kale, beet, collard, chard, etc...
1 tablespoon butter
1 tablespoon olive oil
1/4 cup dried currants or raisins
1/3 cup red wine vinegar
1 teaspoon ground black pepper
1 teaspoon celery salt
1 teaspoon kosher salt

De-stem the greens and rinse/wash thoroughly. This may take several baths in water and several spins around the spinner. Chop coarsely. Since the greens take only 5 minutes, begin cooking only when the ribs and beans are done.

Add the butter and olive oil to a hot pan, keep the heat on medium-high. Once the butter is melted and begins to brown, add the greens. Add the currants, celery salt, kosher salt, pepper, and vinegar. Stir occasionally until softened and done, about 5 minutes.

Plate everything in neat little piles.

You may touch up a little BBQ sauce if you like. I'm not a total purist and if that floats your boat... then, who am I to blow against the wind?


Posted
Authordavid koch
Share

photo by Dave Koch

In our latest CSA box from Eatwell Farms we received a bundle of Lemon Verbena.  I'm completely unfamiliar with the herb.  What do I do with it?  Fish?  Steak?  Tofu? 

It smells like the essence of lemon, almost more lemony than lemons.  There is also a woodsy note, not as up-front as the lemon but definitely there.  Earthy, herbal, almost cedar-ish.  I'm intrigued.

Lemon Verbena

 So, I read a little... 

The plant is native to South America and grows to a height of about a foot or so.  It is often used in herbal teas, commonly with mint and lavender.  It is also found in perfumes, potpourri, and sachets. 

The leaves dry up quickly; within hours of being picked.  The leaves are tough though, and are often removed from the drink or dish once they have added their flavor, much like bay leaves.


With each box from Eatwell comes some recipes and enclosed this week was one called Fruit in Lemon Verbena Syrup.  So I figure since I'm a neophyte of the herb, let's start there... this is a variation of theirs, ad libitum


 I began by making the syrup which was "simply" water, sugar, and Lemon Verbena. I eye-balled all three but close to 2 cups water, 1 cup sugar, and 1/2 cup dried Lemon Verbena.

I brought it to a boil, then killed the heat, and allowed it to cool.


Then I sliced up some fruit.  I used Cantaloupe, Oranges, and Strawberries.


Cantaloupe


Oranges


Strawberries

By the way, Eatwell's Strawberries are some of the most delicious I've ever had, and I grew up in California, which produces more than 85% of the US' strawberries. 

What I noticed at a glance was how much smaller and darker they are than what you normally find.

Also, when I bit into them, their seeds were more pronounced than what I'm used to.  Not unpleasant, but you notice them more.


I put the Lemon Verbena Syrup in a squirt bottle and hosed down the fruit salad with what may have been 2 tablesoons of it.  I finished it by topping it with Goji Berries.

The extra syrup I think will make some fun cocktails, specifically, I think it would go well with gin.  Both have that herbal/woodsy flavor; gin deriving its dominant character from juniper.  I'll let you know.


Posted
Authordavid koch
CategoriesRecipes
Share

photo by Antoinne von Rimes

Eat more duck?  I don’t know why we (Americans) don’t eat more duck.  I just had a pan roasted duck breast with coca sauce, served on a bed of lentils with cipollini onions the other day at Citizen Cake here in San Francisco, and throughout the meal I could not stop asking myself why I don’t eat more duck.  I love duck.

Duck has so much more flavor than chicken, and roasted duck fat and crispy skin surpasses that king of fatty delicacies bacon any day.  And, I really love bacon.  But, duck is another realm of sensuous eating pleasure.  Duck is like an affair with an exotic beauty who barely speaks your language.  Bacon is a fling with the hot bartender around the way.

Duck is never mentioned in those poultry scares.  I cannot remember any duck recalls, bans, poisonings, or governmental white papers against it.  The only thing we hear about is the whole foie gras flap.  Is it cruel, or is it not cruel?  If I were a duck I think I would say it is cruel to force me to eat when I do not want to eat, but if I were a duck I would also feel the evolutionary need to stuff myself silly for the long flight South and would feel it even more cruel if my keeper did not feed me all I crave to eat.  Other than that duck is free from controversy (to my limited culinary focused knowledge).

So why do we not eat more duck?  Expense?  Hell yeah, that’s one reason.  Duck is expensive here in the States.  You may give the old chicken purchase the once around the brain and compare it to the cost of hamburger, but duck…that’s a stop and ponder this for awhile purchase.

Availability?  Yeah, that is also a problem in most areas.  You can’t just pop down to the market and pick up a fresh duck or duck breast.  Well, I live in San Francisco, and I can go to Chinatown and have them slaughter the duck of my choice for me.  If I was inclined to do that, and if my Cantonese was up to snuff to get it done. I assure you, I have not and it is not… so relax.  But availability is a problem because the only duck you are going to find is more than likely whole and frozen, and then you have to plan, thaw and wait.  Ok, duck seems really impractical now.

Treatment?  This is the last obstacle I see with duck.  Not the ethical treatment of them; although, that crosses my mind too.  I mean how should you cook it?  Should you butcher it and pan roast or grill the breast, and make confit out of the legs and thighs?  Or, should you break out the bike pump and fan and Peking that sucker?  That’s the dilemma.  

If I was Chef Gary Danko I could turn it into duck breast prosciutto, but there is only one Danko and I am not he.  If I was uber Chef Thomas Keller, I could create some dish out of duck that could revive the dead, but I am not Thomas Keller either.  I am just an ordinary cook who loves duck and cannot get past the Expense, Availability, and Treatment of duck in order to EAT duck.

If I lived in France, I don’t think I would have this problem.  I could buy fresh duck breasts, pay a bit more for it than chicken, go home and pan roast them, and use the rendered duck fat to fry some potatoes.  I could eat duck at will, and then ponder why I don’t eat more pheasant.  I’m still going to try and eat more duck.  

How about you?

Posted
AuthorAntoinne von Rimes
2 CommentsPost a comment
Share

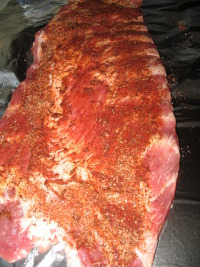
Summer is just around the bend, and the smell of early evening BBQs (or as some of you say ‘cook-outs’), in the air is already abound. Good people, good food, good beverages, good times. While there always must be a meat, or a variety thereof to make a great BBQ, I love the sides, and one of my favorites is chili accompanied by cornbread.

It most recently reminds me of a 4thof July BBQ at my old greasy spoon house—no offense guys—on Bay Street in San Francisco, a fun day indeed!

Chili and cornbread for a BBQ you say? Yes, and here is why. It’s the perfect side for all of your favorite meats OR vegetables. Slathering chili on your burger or hotdog immediately adds a tremendous amount of texture and flavor, and if you stock up on some small bowls, it also makes a great starter.

A pot of chili can easily stay warm if you have a burner on your grill, or even in a closed container outside. Some of you might eat cornbread with the chili, but it can also serve as a desert, which is what I prefer. Nothing better than hot cornbread slathered in butter and honey. “More please!”

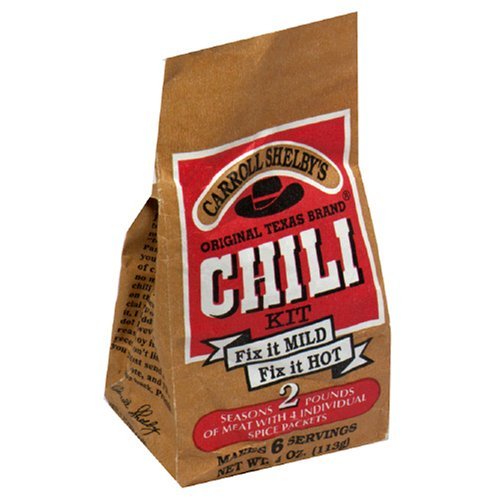
My favorite recipe for chili comes from my mother Pam "Pamcake" Wilkinson, who still makes chili every once-in-awhile when I come home and visit—especially for me. And for all of you folks like me who sometimes take the easy route in cooking, Mrs. Wilkinson’s specially-kept-unrevealed-until- today secret makes it a painless process—Carroll Shelby’s Original Texas Brand Chili Kit.

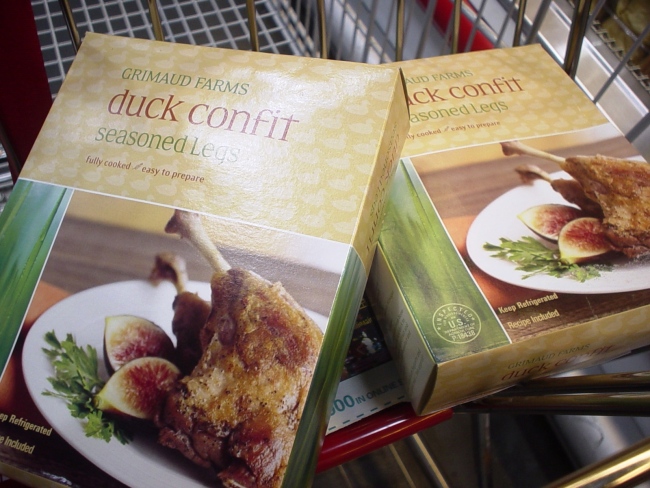
And just like the saying goes, good things come in small packages, the only thing I’d add to that is, sometimes in small brown packages (as shown below). Carroll Shelby’s is usually available at your local grocery store, or you can order it online.

Carroll Shelby's Original Texas Style Chili

Ingredients

  • 2 pounds ground beef
  • 1 8-ounce can tomato sauce
  • 2 cups water
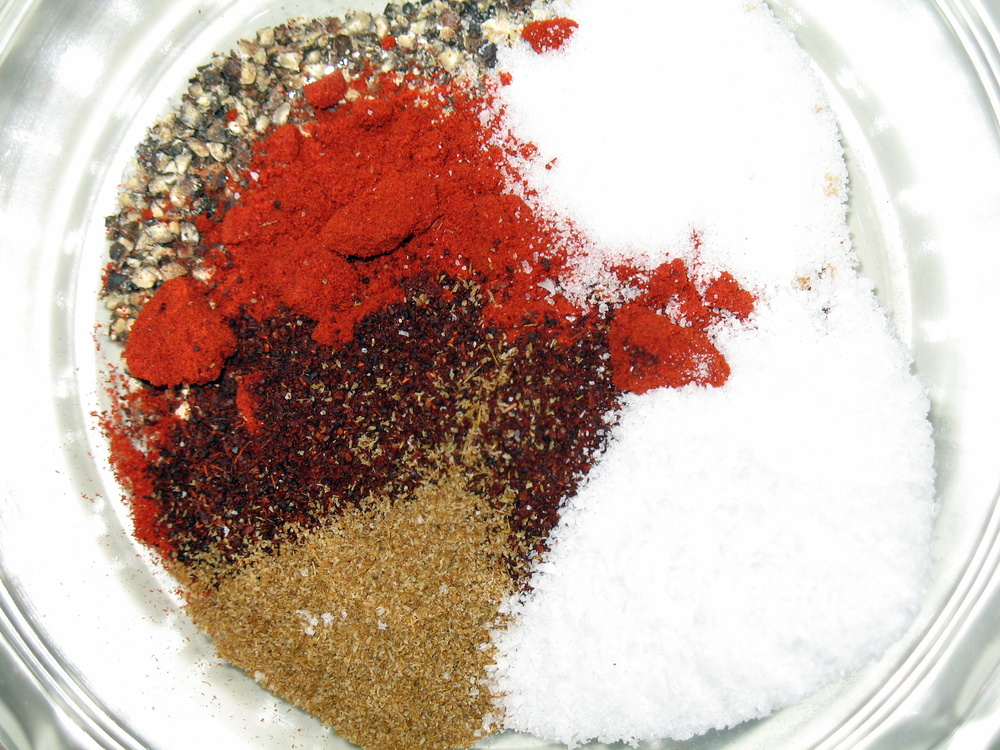
  • 1 package Carroll Shelby's Chili Kit (contains all of the essentials below):
    • -1 chili packet for seasoning
    • -1 packet of cayenne pepper
    • -1 packet of salt
    • -1 packet of masa flour for thickness

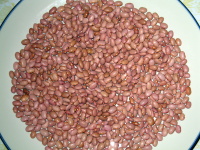
Option to add beans (I always do, and prefer white beans, although a can of kidney would work as well)

For chunkier chili, feel free to add canned tomatoes to taste


Instructions

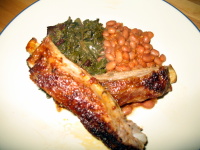
Brown ground beef in large skillet. Drain fat. Add tomato sauce and water. Add Large Spice Packet and salt to taste. For spicier chili, add cayenne pepper (small red packet*). Cover and simmer for 45 minutes, stirring occasionally. Serve piping hot. Makes 5 servings.

*I like spice, so I always heat it up with the cayenne pepper

Hey history buffs, there actually is a Carol Shelby, and he’s a former race car driver that had a chili recipe named after him. If only we could all be so lucky.

And for all of you that are counting your calories, which I sure as heck should be, you can find calories and nutritional information here.

Other useful links:

International Chili Society

Chili Appreciation Society International

Chilicon carne - Wikipedia, the free encyclopedia

chili: Food Network

Red Hot Chili Peppers Online

snopes.com: Finger in Wendy's Chili

Posted
AuthorMichaela Wilkinson
CategoriesRecipes
3 CommentsPost a comment
Share

photo by Amy Koch

A fresh, simple, yet impressive dish for you and your loved one, or for entertaining guests.  The beauty is in its simplicity; you only need 8 ingredients.  This also takes less than a half hour to complete so you'll have more time to spend with the people you are with.

I made this to submit to SippitySup's Tomatomania contest.  Oh!  Be sure to use a white a wine that you will drink with it because you only need a little bit for the sauce.  

Ingredients:

· ½ pound of medium shrimp, 12-15 shelled and deveined

· 3 large slicer tomatoes concasséd (peeled, seeded, and chopped)

· 2 cloves garlic minced

· ¼ cup basil, chiffonade

· 6 ounces linguine

· 2 tablespoons olive oil

· Juice of half a lemon

· 2 tablespoons of dry white wine

· Salt & pepper, to taste

Instructions:

Heat 1 tablespoon of olive oil in sauté pan, add minced garlic, sauté for 30 seconds. Add concassé of tomatoes. Sauté for 3-5 minutes until tomatoes begin break down, then add 2 tablespoons of the white wine plus 1 teaspoon of salt and let simmer for 10-15 minutes.

Meanwhile, bring a large pot of water to boil for the pasta and cook according to the box’s instructions. In another pan, heat additional 1 tablespoon of olive oil, season shrimp with salt and pepper, and sear for 1 minute each side, squeeze lemon juice over shrimp, then add them to the tomato sauce. Let simmer in sauce for an additional 2 minutes to finish cooking.

Toss noodles with sauce and basil. Enjoy!

Serves 2.


Posted
AuthorAmy Koch
CategoriesRecipes
4 CommentsPost a comment
Share

photo by Dave Koch

Also known as Jerusalem Artichokes, you can make Sunchokes into a quick, easy, and delicious soup in about 15 minutes.  Interestingly enough, Sunchokes are native to North America and are one of the continent's only tubers.  When they bloom, their flower looks much like a small Sunflower.  

The name Jerusalem artichoke is from the Italian name Girasole articicco (Sunflower Artichoke) because of their plumage and because the first group of Italians to snack on them thought they tasted like artichokes.  When the name came back to the New World, Americans had difficulty saying Girasole and thus converted it to Jerusalem.

And now back to the soup.  In full disclosure, these were the first Sunchokes I have had.  I peeled them, cut off a little piece to eat raw, and was blown away by how sweet they were.  My first thought was how tasty they would be raw in a salad, much like Jicama - maybe next time, soup was already in the works...


Ingredients:

  • 1/2 pound of Sunchokes, peeled and diced 
  • 2 small carrots, or one giant one, diced
  • 2 ribs of celery, diced
  • 1 tablespoon of chicken or veggie bouillon, I like the brand Better than Bouillon  
  • 4 cups water
  • Olive oil
  • Salt & pepper


Instructions:

In a medium/hot pan, add a tablespoon of olive oil, the carrots, celery, and the sunchokes.  Season well with salt & pepper and sauté until soft, about 5 minutes.  When they yield easily to being prodded with a fork, add the water and the bouillon and bring to a boil.  

Hold the boil for 5 minutes, and when complete, blend thoroughly with an emersion blender (or transfer to a traditional blender in batches).  I garnished with a dollop of yogurt, a drizzle of olive oil, and a few squirts of Sriracha Hot Sauce.

Enjoy!

Posted
Authordavid koch
CategoriesRecipes
2 CommentsPost a comment
Share

photo by Matt Haas This might be the biggest no brainer ever.  


Ingredients:

  • Bread
  • Olive Oil
  • Salt
  • Pepper
  • Parmesan Cheese  


Directions:

Preheat oven to 400 degrees. Cut bread into cubes and toss with oil, salt & pepper and a generous dusting of parm.  Arrange in a single layer on a baking sheet and cook until golden brown, about 15 minutes.  Add to your soup or salad while still warm.


photo by Matt Haas

Notes: I always have some frozen bread in the freezer - maybe half a baguette, the end of a rustic loaf, whatever.  Fresh bread is fine, but this is a really great use of leftovers.  I love cooking up a small batch of homemade croutons and tossing in a salad while they are still a little warm.  Trust me.


photo by Matt Haas

Posted
AuthorMatt Haas
CategoriesHumor, Recipes
Share

photo by Dave KochI have never been a fan of red wine vinegar, and simply because they always seem watered down.  The gold standard brand, Regina, is often all you can find at the store - and although it does the trick, it is lacking both depth and character.  There are spectacular balsamic vinegars out there and most people have tasted them before.  Why then, is red wine vinegar so often ignored?

A friend of mine recently started making his own vinegar with a mother he purchased at our local homebrew supply store, San Francisco Brewcraft.  They are wealth of information by the way on any and everything fermented: beer, wine, and vinegar.  My friend's vinegar mother regenerated and he gave my two discs of mother.

For my wine selection, I wanted to go with something deep, dark, and tannic; the antithesis of your typical store-bought red wine vinegar.  I chose a superbly rich Petite Syrah (which is also called Durif).  It looked like black ink.  I bought a glass jar at The Container Store and removed the wire and lid.  I poured in the wine, added the mother, secured a coffee filter with a rubber band, placed it in the cupboard, and began the waiting process.

Tasting it every few weeks allowed me to follow its progress.  At 6 weeks, the wine-y flavors had definitely moved aside and the distinct pungency of vinegar took over.  After three months, it was strong enough to take your breath away... literally.  It was so potent at this point, taking a sip could asphyxiate you.  It was delicious.


photo by Dave Koch

I found a nice little retro glass salad dressing container and diluted it 1:1 with water.  At this strength, the acidity mimicked what I was used to, but my creation was a heck of a lot more flavorful.  With this in my armamentarium, my Perfect Vinaigrette is complete.  It is tangy, earthy, salty, and nutty.  It enhances the vegetable's flavor without overpowering them.


Perfect Vinaigrette: 

  • 1/2 cup Extra Virgin Olive Oil, the grassier the better
  • 3-4 tablespoons Red Wine Vinegar, homemade is best!
  • 1 heaping tablespoon Mustard, I prefer Dijon
  • 1 heaping teaspoon Brewer's Yeast, I like TwinLab
  • Salt and Black Pepper, to taste

Whisk everything together or put into a mason-type jar and shake well.  Taste before adding salt as brewer's yeast is naturally salty (and nutty, and delicious).  You can adjust the oil to vinegar ratio to you liking.  I like mine with a lot of black pepper.  

Toss over salad and enjoy! 

Posted
Authordavid koch
4 CommentsPost a comment
Share

photo by Dave Koch

Mixing chili and chocolate was the status quo in Aztec times and has always been popular in Mexico but has only recently become more prevalent in the US.  I see the pair frequently at chocolate boutiques and really enjoy how well they work together.  After a long week of work, the sweet-tooth fairy came out to play and we decided to make some Hot Brownies last night.  

We didn't have everything planned ahead of time but we based this recipe on Brownies Cockaigne from of the Joy of Cooking.  We didn't have unsweetened chocolate like it called for, and doing it over, we may omit some of the sugar.  I guessed at the amount of chili to add and I think it was a good educated guess because it worked out.


Ingredients:

4 eggs
2/3 cup flour
1/2 cup cocoa powder
4 ounces milk chocolate chips
6 tablespoons butter
2 cups sugar (this looked like too much)
2 teaspoons vanilla
1 cup walnuts
1/2 cup white chocolate chips
2 tablespoons cayenne chili powder

Directions:

"The Joy" recommends that everything starts out at room temperature, which is fine - unless you are making them on a whim like we did.  

Preheat the oven to 350 degrees and grease a 13 x 9-inch baking pan with butter or spray.  

In a double-boiler (or a metal bowl over a pot of boiling water) combine  the chocolate chips and the butter and melt slowly.  Beat the eggs in a separate bowl.  In another bowl, mix together the flour, cocoa powder, walnuts, white chocolate chips, and cayenne chili powder.

Once the chocolate and butter mixture is melted set aside to cool.  Once cool enough to handle, mix in the vanilla, sugar, and then the eggs. Incorporate the dry ingredients and be careful not to over mix. Working the batter too much at this point will begin to form gluten and make the brownies tough, not gooey.

Bake for 25 to 30 minutes, begin checking them at 25 minutes.  They are done when a toothpick inserted into the middle comes out clean with no wet batter stuck to it.  Allow them to cool for 15 minutes before trying to remove them from the pan.


photo by Dave Koch

The chili flavor is barely perceptible while the heat is coy; not noticeable at first, but sneaking up after a few bites.  The burn is like seeing someone who you think you recognize.  You exchange glances, holding your gaze longer than normal, wondering if you can find what it is about them you recall.  Then it hits you - yes!

One very "cool" effect is that the warmth lingers for a few minutes after you have finished your last bite, warming you from the inside.  If you were to add only 1 tablespoon, the chili would add only a subtle nuance.  I'd be willing to bet that no one would be able to pick it out.

But what would be the fun in that?

Make mine hot!

Posted
Authordavid koch
Share

Turkey Meatball Sandwiches on Whole Wheat Buns - photo by Dave Koch

Coincidentally enough, Chow.com's Recipe of the Day last Tuesday (March 24th) was the Meatball Sub.  This is my lighter version of the standard meatball sandwich.  I used ground turkey instead of beef, whole wheat buns in place of white bread, and bake the meatballs instead of searing them in oil.  A guilt-free, easy to prepare meal that the whole family will love!


Ingredients

  • 1.25 pounds ground turkey
  • 3/4 cup yellow onion, minced
  • 3 cloves garlic
  • 1/4 cup dried italian breadcrumbs
  • 1 egg
  • 1/4 cup grated parmesan cheese
  • 3 Tablespoons parsley, finely chopped
  • 1 jar of your favorite marinara sauce
  • 1 can (14 oz) diced tomatoes
  • 10-12 oz fresh mozzarella, sliced
  • 6 whole wheat hoagie or hot dog buns


Directions

Preheat oven to 375 degrees.

In a large bowl combine turkey, onion, garlic, breadcrumbs, egg, parmesan, and parsley. Mix ingredients to combine, however, do not over mix as meat will become tough.

Form mixture into balls and place on a sheet pan sprayed with olive oil. Bake in oven for 10-20 minutes, until just barely cooked through.  While meat is baking, combine marinara sauce with canned tomatoes in large saute pan and let simmer. 

Place cooked meatballs in tomato sauce and let simmer together 3-5 minutes. Serve warm meatballs in buns with slice mozzarella.

Serves 6

Posted
AuthorAmy Koch
CategoriesRecipes
2 CommentsPost a comment
Share