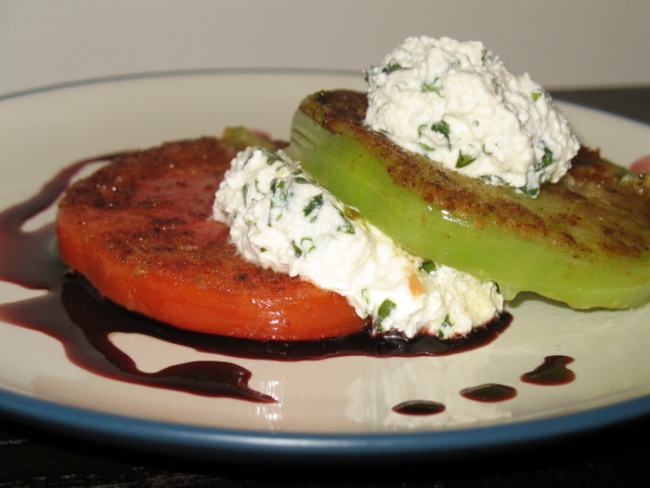
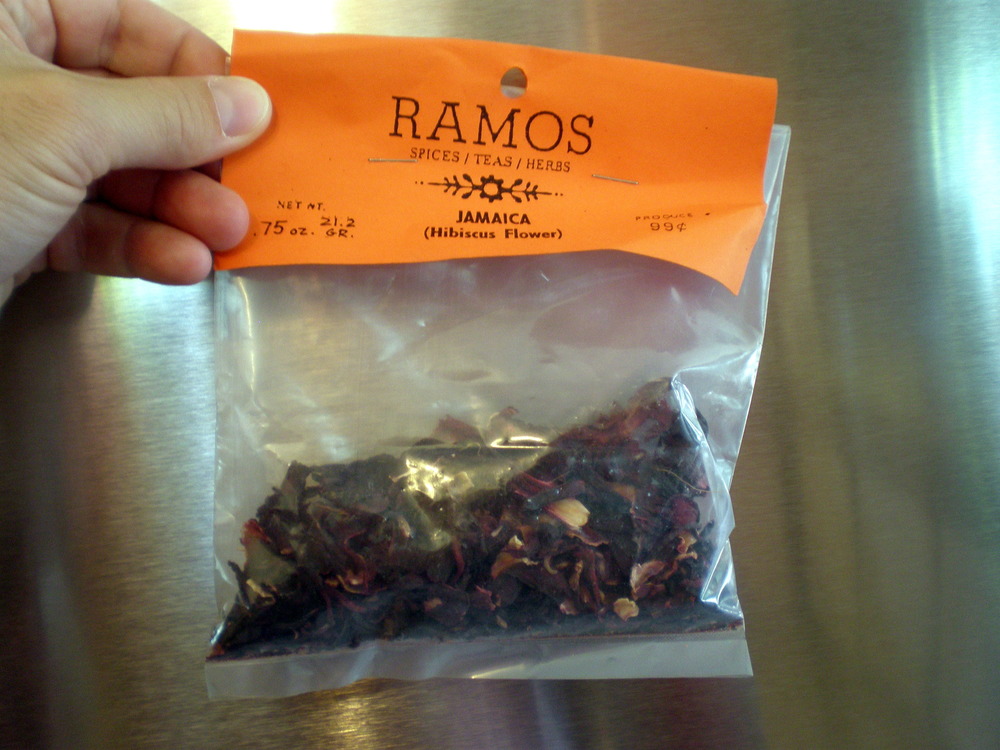
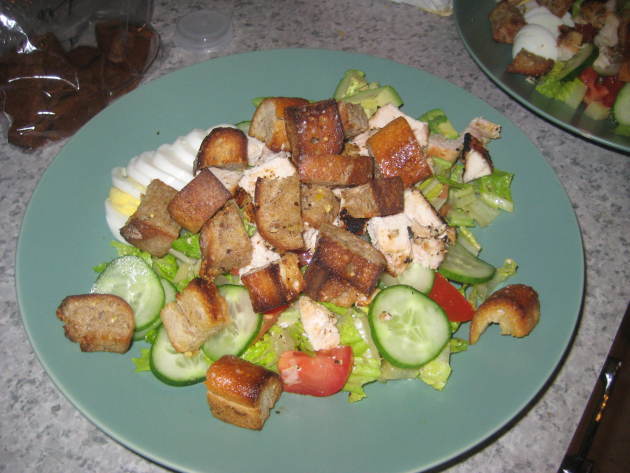
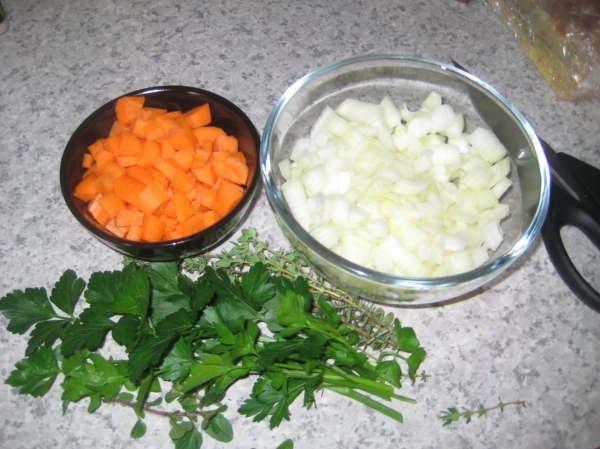
photo by Amy Koch

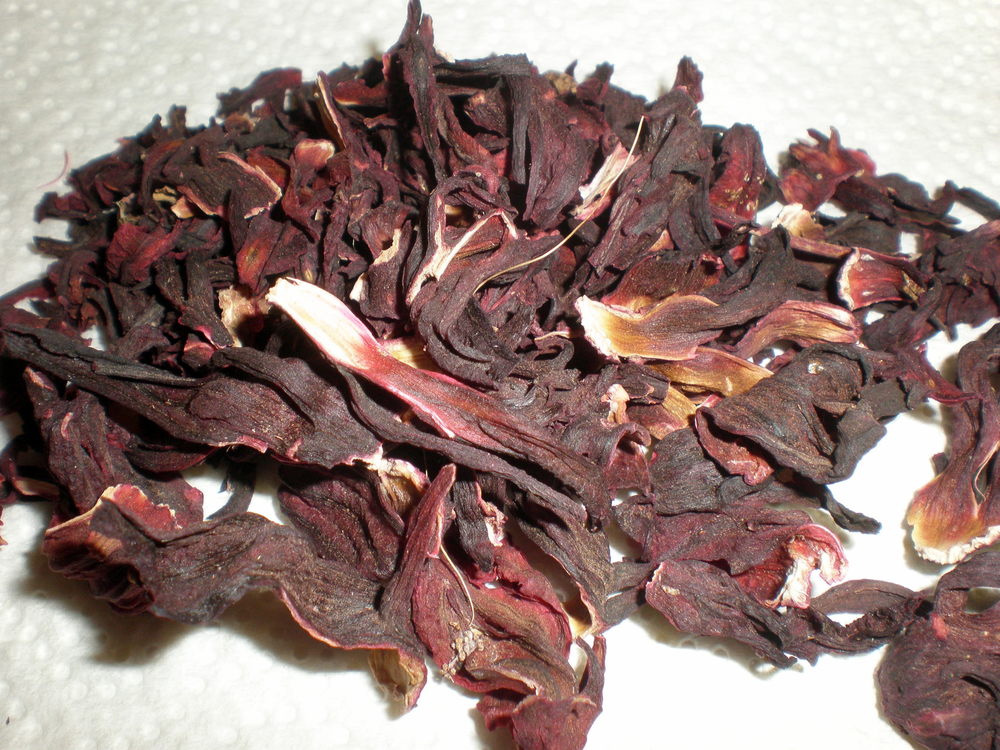
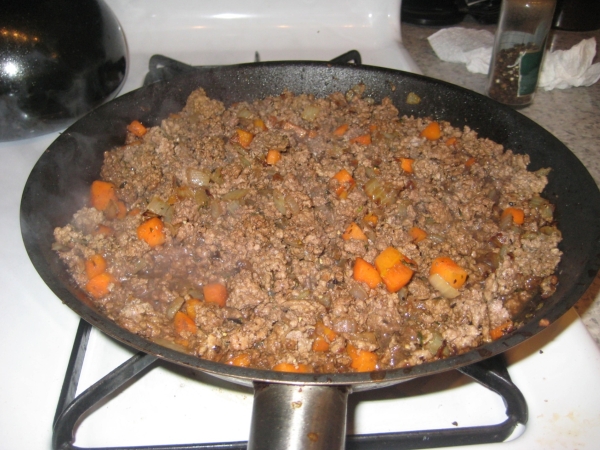
A fresh, simple, yet impressive dish for you and your loved one, or for entertaining guests.  The beauty is in its simplicity; you only need 8 ingredients.  This also takes less than a half hour to complete so you'll have more time to spend with the people you are with.

I made this to submit to SippitySup's Tomatomania contest.  Oh!  Be sure to use a white a wine that you will drink with it because you only need a little bit for the sauce.  

Ingredients:

· ½ pound of medium shrimp, 12-15 shelled and deveined

· 3 large slicer tomatoes concasséd (peeled, seeded, and chopped)

· 2 cloves garlic minced

· ¼ cup basil, chiffonade

· 6 ounces linguine

· 2 tablespoons olive oil

· Juice of half a lemon

· 2 tablespoons of dry white wine

· Salt & pepper, to taste

Instructions:

Heat 1 tablespoon of olive oil in sauté pan, add minced garlic, sauté for 30 seconds. Add concassé of tomatoes. Sauté for 3-5 minutes until tomatoes begin break down, then add 2 tablespoons of the white wine plus 1 teaspoon of salt and let simmer for 10-15 minutes.

Meanwhile, bring a large pot of water to boil for the pasta and cook according to the box’s instructions. In another pan, heat additional 1 tablespoon of olive oil, season shrimp with salt and pepper, and sear for 1 minute each side, squeeze lemon juice over shrimp, then add them to the tomato sauce. Let simmer in sauce for an additional 2 minutes to finish cooking.

Toss noodles with sauce and basil. Enjoy!

Serves 2.


Posted
AuthorAmy Koch
CategoriesRecipes
4 CommentsPost a comment

photo by Dave Koch

We saw some really nice heirloom tomatoes at our Whole Foods the other day (we also saw San Francisco's Mayor, Gavin Newsom but that's another story) - and SippitySup's tomatomania contest was fresh in my head.  I came up with this recipe thinking about putting a new twist on the ubiquitous caprese salad.

By breading and frying the tomatoes, you get a little crunch, and their sugars begin to caramelize. Their natural sweetness is enhanced by the honey in the reduction and the acidity adds a POP that would otherwise be missing with only the cheese, basil, and tomatoes.

The key to pulling this off, is mise en place; getting everything set so that you can plate it in a jiffy, serve, and eat while it's still piping hot. Once you begin to cook the tomatoes, they’ll start to break down, so work quickly. Half the texture is in keeping a little bite to the tomatoes to contrast with the soft cheese.

Ingredients:

· 2 nice heirloom tomatoes, a red and a green preferably
· 1 cup of ricotta, I used "part skim"
· 1/4 cup of basil, minced fine
· 1/4 cup flour
· 1/4 cup bread crumbs
· 1/4 Parmesan cheese, grated
· Salt & pepper
· 1 cup red wine vinegar (homemade is best!)
· 1 tablespoon honey
· 2 tablespoons olive oil
· 2 tablespoons butter


Instructions:

Begin by reducing the red wine vinegar with the honey in a small pot over medium heat, this step will take the longest.  Mix your basil and the ricotta in a bowl.  Slice the tomatoes about 1/2 inch thick, thicker slices hold up better and are less likely to fall apart.

Combine the flour, bread crumbs, and the Parmesan cheese on a large plate so that you can dip the tomato slices into it easily.  Be sure to season the bread crumb mixture well with salt and pepper, about a tablespoon of each. It may seem like a lot, but not all of it will stick to the tomatoes.

I recommend a non-stick pan for this because the breading is likely to separate from the tomato otherwise.  Add a tablespoon each of the olive oil and the butter to the pan, and put on medium-high heat - you are not supposed to heat a non-stick pan dry. Once the butter begins to foam, quickly dip the tomatoes into the breading so that you get an even coat on both sides (don't do this ahead of time or you will make glue).  Place into the pan.

Fry until GBnD (Golden Brown and Delicious), about 2 minutes on each side.  Place one tomato slice on the plate, add a dollop of basil ricotta on top, then the other slice of tomato, then another dollop of ricotta.  Spoon a drizzle of the vinegar reduction around the sides.  Serve immediately.

Makes enough for 2.


Posted
Authordavid koch
CategoriesRecipes
3 CommentsPost a comment

The B-PB-B!.  Kind of a shoddy photo for such a delicious sandwich (it was taken with my phone) but the muses were with me when I came up with it.

I know it sounds crazy but don't laugh until you try it!

The saltiness of the bacon and the saltiness of the peanut butter play nice together on the swings while the basil is is busy getting dizzy on the carousel.

There is creamy, crunchy, salty, and herbal all going on.  White bread allows all the flavors to shine but whole wheat would be good too.

Ingredients:

3 strips of bacon - baked, nuked, or fried

2 pieces of white bread, toasted

1 small handful of basil, about 6 large leaves

1 smathering of peanut butter - chunky or smooth, your call

Instructions:

Put everything in between the slices of bread.  Eat.

Posted
Authordavid koch
CategoriesHumor, Recipes

photo by Dave Koch

The weather is warming up, the birds are singing, and the avocados are calling my name.  It is the beginning of guacamole season; that beautiful time of year where people gather around a molcajete with a cerveza in one hand and a tortilla chip in the other, jockeying for position to get the very best scoop.

Some people are looking for the biggest chunk of avocado, that somehow avoided being pulverized.  Some are looking for a particularly large dice of tomato.  Some poor saps are trying to find a smedge with no clear signs of cilantro, because they live their entire sorry existence in fear of biting into one of its pungent leaves.

In any case, I'm a guacamole freak.  If I found a big swimming pool filled with the stuff, I would be compelled to dive in.  I make a mean guac.  I make the kind that sings babies to sleep.  I make a guac that people write songs about.  My guac makes recent widowers momentarily forget to moarn.  It makes rap-stars write lyrics like, "My guacamole brings all the boys to the yard."

Unfortunately when dining out, I am all too often disappointed.  There's too much fluff, too much filler, too much salsa (if you're calling it guac, it's guac, not salsa with avocado - which is good, but it's not guac).  Sometimes there's onion powder, or garlic powder, or cumin; or worse yet a combination of the three.  Sometimes the color is off, it's green but it's awry - it's not natural, back away!

Too often I catch myself saying "hold the guac," not because I don't like guac, I love it, but because I like it so much, that I don't trust it in your hands...  I feel compelled so often to explain - but that can get confusing.  I can tell by the way you are moving your lips while you read this, you're about to taze my guac.  Don't taze my guac bro.  This is how it's done:


Don't Taze My Guac

Ingredients: 

  • 4 Avocados, Haas are great but if you can find other varieties like the Bacon and the Fuerte, branch out
  • 1/3 cup lime juice, about the juice of 2 limes, 3 if you're not getting much out of them
  • 1/2 an onion, diced
  • 3 tomatos, diced
  • 1/4 cup of cilantro, coarsly chopped
  • 1 tablespoon of salt
  • 1/2 tablespoon of black pepper
  • 1 serrano or jalapeno, minced, is OK but not necessary

Instructions:

Open a fine Mexican beer.  Lo ciento novato, pero Corona y Tecate don't count.  Try Negro Modelo, Bohemia, or even Pacifico.  Cut a slice out of one of your limes, insert into beer.  Throw all your ingredients into a bowl (not the beer, keep the beer in your hand).  Mix together, but not too well.  

If you want to make this ahead of time, go ahead, but squirt more lime juice on top and then cover with plastic wrap.  Oxygen will turn the avocado brown and acid prevents this (just like apples).

Enjoy.


Lastly I'll leave you with a hilarious tribute song to the green (although we disagree somewhat on the accoutrements), "Some add in serrano, some like jalapeno, don't make it to hot though, when serving it to gringos" 


Posted
Authordavid koch
CategoriesRecipes
4 CommentsPost a comment

photo by Dave Koch

Confit is a very old method of preserving, the word confit in fact comes from confire which means "to prepare."  It most often recognized as confit of goose (confit d'oie) or duck (confit de canard) but the principles are similar no matter what you are preparing.  In the case of meat, you cook the meat in its own fat and a hefty amount of salt, and it is stored that way - stored in the fat because as it cools, it solidifies.

For fruit; however, it is sugar that drives out the moisture, not cooking with fat.  Thanks to friends of ours, we have an abundance of lemons right now and preserving them was going to be the only way from preventing them all to spoil.

This is an adaptation of Tom Colicchio's Lemon Confit from his book Think Like a Chef.


Ingredients: 

  • Lemons, lots of them - for the amounts below, use a dozen
  • 3 Shallots
  • 8 cloves Garlic
  • 2/3 cup Salt
  • 1/3 cup Sugar
  • Olive oil, a few cups

Instructions:

Blanch the lemons by dropping them into boiling water for about thirty seconds.  This removes any wax they might have been sprayed with, and should kill any mold spores.  Wipe clean and slice thin.  You could use a mandolin, but we weren't too picky so we used a knife.  

Mix the sugar and salt, put into a bowl.  Mince the shallots and the garlic fine, combine.  

Place a layer of the lemon slices at the bottom of a container, glass is best.  (We made this at a friends house so there are pictures of a Tupperware, but we transferred them into a glass jar when we got home).  

Following the layer of lemons, sprinkle some of the salt/sugar mixture, and then some of the shallot/garlic mixture.  Repeat until you run out: lemons, salt/sugar, shallot/garlic.  

Lightly pat down everything, we used a wooden spoon, and add olive oil until everything is covered and not exposed to air.  Make sure your container has a lid, put that on too.

Leave at room temperature for three days then place in the refridgerator.  They will keep for up to three months.  

Use in chicken, fish, or veggie dishes to add zest and color.  The acid and garlic supposedly mellow out and meld together with time.  Lemon confit and otherwise preserved lemons are common ingredients in Moroccan and Middle Eastern recipes, but I'll bet will make a fantastic condiment to almost anything.


Posted
Authordavid koch
CategoriesRecipes
4 CommentsPost a comment

photo by Dave Koch

Also known as Jerusalem Artichokes, you can make Sunchokes into a quick, easy, and delicious soup in about 15 minutes.  Interestingly enough, Sunchokes are native to North America and are one of the continent's only tubers.  When they bloom, their flower looks much like a small Sunflower.  

The name Jerusalem artichoke is from the Italian name Girasole articicco (Sunflower Artichoke) because of their plumage and because the first group of Italians to snack on them thought they tasted like artichokes.  When the name came back to the New World, Americans had difficulty saying Girasole and thus converted it to Jerusalem.

And now back to the soup.  In full disclosure, these were the first Sunchokes I have had.  I peeled them, cut off a little piece to eat raw, and was blown away by how sweet they were.  My first thought was how tasty they would be raw in a salad, much like Jicama - maybe next time, soup was already in the works...


Ingredients:

  • 1/2 pound of Sunchokes, peeled and diced 
  • 2 small carrots, or one giant one, diced
  • 2 ribs of celery, diced
  • 1 tablespoon of chicken or veggie bouillon, I like the brand Better than Bouillon  
  • 4 cups water
  • Olive oil
  • Salt & pepper


Instructions:

In a medium/hot pan, add a tablespoon of olive oil, the carrots, celery, and the sunchokes.  Season well with salt & pepper and sauté until soft, about 5 minutes.  When they yield easily to being prodded with a fork, add the water and the bouillon and bring to a boil.  

Hold the boil for 5 minutes, and when complete, blend thoroughly with an emersion blender (or transfer to a traditional blender in batches).  I garnished with a dollop of yogurt, a drizzle of olive oil, and a few squirts of Sriracha Hot Sauce.

Enjoy!

Posted
Authordavid koch
CategoriesRecipes
2 CommentsPost a comment

photo by Amy Koch

This salad is easy to assemble and is both refreshing and satisfying.  It is fulfilling enough for a complete weeknight meal - but would also make for an impressive first course.  The citrus vinaigrette adds bright flavors which meld well with with the earthy arugula and fennel.  

Both the vinaigrette and the bean and fennel mixture can be made up to two days ahead of time, then mixed with arugula and topped with Parmesan right before serving.

Ingredients:

Bean and fennel mixture

  • 2 - 14 ounce cans of cannelini beans
  • 1 large fennel bulb, thinly sliced (I used a mandolin)
  • 1/2 of a red onion, thinly sliced (I used a mandolin)
  • 1 orange, supremed (reserve juices for vinaigrette)
  • Salt & Pepper to taste

Vinaigrette

  • Juice of the orange after it was supremed
  • 2 tablespoons of white balsamic or white wine vinegar
  • 1 teaspoon honey
  • 1/4 cup of Olive Oil
  • Salt & Pepper to taste

- 5 ounces of arugula (one standard bag)
- Parmesan, shaved (I used a vegetable peeler)

Instructions:

Combine everything for the bean and fennel mixture.  Toss with half the vinaigrette.  When ready to serve, lightly coat the arugula with the remaining vinaigrette.  Top with bean and fennel mixture.  Shave the Parmesan on top.  Serve immediately.

Serves 4 as a main course, serves 6 as a first course.  Enjoy!


photo by Amy Koch

Posted
AuthorAmy Koch
CategoriesRecipes
3 CommentsPost a comment

 photo by Dave Koch

Here is the perfect Spring drink to celebrate everything coming into bloom.  

Hibiscus Bubbles

It is pink.  It has bubbles.  It is easy.  You can make the extract ahead so that you have more time to spend with your guests.  What more do you really want?

Hibiscus is most commonly found in the form of a drink at Mexican restaurants as an agua fresca commonly called jamaica.  You often find it on ice, in large jars, with metal ladles.  It is tart, fragrant, and absolutely delicious.    

My only complaint is that in aguas frescas, I think its wonderful astringency is often masked with too much sugar.  But then again, I don't drink it everyday so... who am I to blow against the wind?  

You buy hibiscus as dried flowers like these:


 Bring 1 cup of water and 1 cup of sugar to a boil.  Turn the heat off.  Add 1 cup of dried hibiscus flowers.  Allow to steep for 20 minutes.  Strain to get your hibiscus extract.  The extract can be added with water and ice in a 1:1 or 1:2 ratio for making aguas frescas.

Dried hibiscus flowers can be found at any Mexican market, and remember: they are almost always found under their Spanish name jamaica.  


You can also get them online at Mexgrocer.com:

Buy Authentic Mexican Food at MexGrocer.com!


Once you've made your hibiscus extract, to make Hibiscus Bubbles, add about a tablespoon to each Champagne flute and then fill with a sparkling wine.  We used a "California Champagne" but an Italian Prosecco or Spanish Cava would also be fantastic.


 As long as it is sparkling, it doesn't really matter.  My only advise?  I wouldn't use something very expensive because the tartness of the hibiscus and the added sugar take center stage.   They will mask any subtle nuance you may have paid for.


We dropped in a flower into each glass for presentation.  Enjoy! 


Posted
Authordavid koch
CategoriesDrinks, Recipes
2 CommentsPost a comment

photo by Matt Haas This might be the biggest no brainer ever.  


Ingredients:

  • Bread
  • Olive Oil
  • Salt
  • Pepper
  • Parmesan Cheese  


Directions:

Preheat oven to 400 degrees. Cut bread into cubes and toss with oil, salt & pepper and a generous dusting of parm.  Arrange in a single layer on a baking sheet and cook until golden brown, about 15 minutes.  Add to your soup or salad while still warm.


photo by Matt Haas

Notes: I always have some frozen bread in the freezer - maybe half a baguette, the end of a rustic loaf, whatever.  Fresh bread is fine, but this is a really great use of leftovers.  I love cooking up a small batch of homemade croutons and tossing in a salad while they are still a little warm.  Trust me.


photo by Matt Haas

Posted
AuthorMatt Haas
CategoriesHumor, Recipes

photo by Dave KochI have never been a fan of red wine vinegar, and simply because they always seem watered down.  The gold standard brand, Regina, is often all you can find at the store - and although it does the trick, it is lacking both depth and character.  There are spectacular balsamic vinegars out there and most people have tasted them before.  Why then, is red wine vinegar so often ignored?

A friend of mine recently started making his own vinegar with a mother he purchased at our local homebrew supply store, San Francisco Brewcraft.  They are wealth of information by the way on any and everything fermented: beer, wine, and vinegar.  My friend's vinegar mother regenerated and he gave my two discs of mother.

For my wine selection, I wanted to go with something deep, dark, and tannic; the antithesis of your typical store-bought red wine vinegar.  I chose a superbly rich Petite Syrah (which is also called Durif).  It looked like black ink.  I bought a glass jar at The Container Store and removed the wire and lid.  I poured in the wine, added the mother, secured a coffee filter with a rubber band, placed it in the cupboard, and began the waiting process.

Tasting it every few weeks allowed me to follow its progress.  At 6 weeks, the wine-y flavors had definitely moved aside and the distinct pungency of vinegar took over.  After three months, it was strong enough to take your breath away... literally.  It was so potent at this point, taking a sip could asphyxiate you.  It was delicious.


photo by Dave Koch

I found a nice little retro glass salad dressing container and diluted it 1:1 with water.  At this strength, the acidity mimicked what I was used to, but my creation was a heck of a lot more flavorful.  With this in my armamentarium, my Perfect Vinaigrette is complete.  It is tangy, earthy, salty, and nutty.  It enhances the vegetable's flavor without overpowering them.


Perfect Vinaigrette: 

  • 1/2 cup Extra Virgin Olive Oil, the grassier the better
  • 3-4 tablespoons Red Wine Vinegar, homemade is best!
  • 1 heaping tablespoon Mustard, I prefer Dijon
  • 1 heaping teaspoon Brewer's Yeast, I like TwinLab
  • Salt and Black Pepper, to taste

Whisk everything together or put into a mason-type jar and shake well.  Taste before adding salt as brewer's yeast is naturally salty (and nutty, and delicious).  You can adjust the oil to vinegar ratio to you liking.  I like mine with a lot of black pepper.  

Toss over salad and enjoy! 

Posted
Authordavid koch
4 CommentsPost a comment

photo by Dave Koch

Mixing chili and chocolate was the status quo in Aztec times and has always been popular in Mexico but has only recently become more prevalent in the US.  I see the pair frequently at chocolate boutiques and really enjoy how well they work together.  After a long week of work, the sweet-tooth fairy came out to play and we decided to make some Hot Brownies last night.  

We didn't have everything planned ahead of time but we based this recipe on Brownies Cockaigne from of the Joy of Cooking.  We didn't have unsweetened chocolate like it called for, and doing it over, we may omit some of the sugar.  I guessed at the amount of chili to add and I think it was a good educated guess because it worked out.


Ingredients:

4 eggs
2/3 cup flour
1/2 cup cocoa powder
4 ounces milk chocolate chips
6 tablespoons butter
2 cups sugar (this looked like too much)
2 teaspoons vanilla
1 cup walnuts
1/2 cup white chocolate chips
2 tablespoons cayenne chili powder

Directions:

"The Joy" recommends that everything starts out at room temperature, which is fine - unless you are making them on a whim like we did.  

Preheat the oven to 350 degrees and grease a 13 x 9-inch baking pan with butter or spray.  

In a double-boiler (or a metal bowl over a pot of boiling water) combine  the chocolate chips and the butter and melt slowly.  Beat the eggs in a separate bowl.  In another bowl, mix together the flour, cocoa powder, walnuts, white chocolate chips, and cayenne chili powder.

Once the chocolate and butter mixture is melted set aside to cool.  Once cool enough to handle, mix in the vanilla, sugar, and then the eggs. Incorporate the dry ingredients and be careful not to over mix. Working the batter too much at this point will begin to form gluten and make the brownies tough, not gooey.

Bake for 25 to 30 minutes, begin checking them at 25 minutes.  They are done when a toothpick inserted into the middle comes out clean with no wet batter stuck to it.  Allow them to cool for 15 minutes before trying to remove them from the pan.


photo by Dave Koch

The chili flavor is barely perceptible while the heat is coy; not noticeable at first, but sneaking up after a few bites.  The burn is like seeing someone who you think you recognize.  You exchange glances, holding your gaze longer than normal, wondering if you can find what it is about them you recall.  Then it hits you - yes!

One very "cool" effect is that the warmth lingers for a few minutes after you have finished your last bite, warming you from the inside.  If you were to add only 1 tablespoon, the chili would add only a subtle nuance.  I'd be willing to bet that no one would be able to pick it out.

But what would be the fun in that?

Make mine hot!

Posted
Authordavid koch

Turkey Meatball Sandwiches on Whole Wheat Buns - photo by Dave Koch

Coincidentally enough, Chow.com's Recipe of the Day last Tuesday (March 24th) was the Meatball Sub.  This is my lighter version of the standard meatball sandwich.  I used ground turkey instead of beef, whole wheat buns in place of white bread, and bake the meatballs instead of searing them in oil.  A guilt-free, easy to prepare meal that the whole family will love!


Ingredients

  • 1.25 pounds ground turkey
  • 3/4 cup yellow onion, minced
  • 3 cloves garlic
  • 1/4 cup dried italian breadcrumbs
  • 1 egg
  • 1/4 cup grated parmesan cheese
  • 3 Tablespoons parsley, finely chopped
  • 1 jar of your favorite marinara sauce
  • 1 can (14 oz) diced tomatoes
  • 10-12 oz fresh mozzarella, sliced
  • 6 whole wheat hoagie or hot dog buns


Directions

Preheat oven to 375 degrees.

In a large bowl combine turkey, onion, garlic, breadcrumbs, egg, parmesan, and parsley. Mix ingredients to combine, however, do not over mix as meat will become tough.

Form mixture into balls and place on a sheet pan sprayed with olive oil. Bake in oven for 10-20 minutes, until just barely cooked through.  While meat is baking, combine marinara sauce with canned tomatoes in large saute pan and let simmer. 

Place cooked meatballs in tomato sauce and let simmer together 3-5 minutes. Serve warm meatballs in buns with slice mozzarella.

Serves 6

Posted
AuthorAmy Koch
CategoriesRecipes
2 CommentsPost a comment

photo by Dave Koch

This simple and easy asparagus soup can be whipped up in about a half an hour.  Its richness comes from infusing the chicken stock with the woody ends that normally get discarded.  I use milk instead of cream to keep it light and so as not to overpower the deep flavor of the vegetables.  Along with some crudité, some buttered toast, or a salad, this is a main course.

Serves 2 

  • 1 bundle of asparagus (about 1.5 lbs.)
  • 1/2 a yellow onion, chopped
  • 3 cloves of garlic, chopped
  • 1 stalk of celery, chopped
  • 4 cups chicken stock
  • 1 oz. butter
  • 1 tablespoon olive oil
  • 1/4 teaspoon red chili pepper flakes
  • 2 cups milk (we used 2%)
  • The juice of one lemon, about 1 tablespoon
  • Salt and pepper to taste


Cut off the tough woody ends of the asparagus and put into a small pot with the chicken stock and bring to boil.  Allow to boil for at least 15 minutes to infuse the stock with flavor.

In the meantime, chop the rest of the asparagus into 1 inch pieces.  Heat up a large pot with the butter and olive oil.  Sauté the onions, garlic, celery, and asparagus and add the red chili pepper flakes.  Season well with salt and pepper.  Allow to cook until all the veggies are soft, about 5 minutes.

Remove woody asparagus ends from small pot and throw away.  Pour the asparagus infused chicken stock into the large pot with the sautéed vegetables.  Simmer for 10 minutes.

Puree mixture with an immersion blender right in the pot.  In lieu of an immersion blender, a regular blender of food processor can be used.  After it is rendered completely smooth, add the milk and lemon juice.  Stir well, and taste.  Add more salt and black pepper if necessary.

Garnish with a dollop of yogurt, a drizzle of your very best olive oil, and a few almond slivers.

Enjoy!


Posted
Authordavid koch
CategoriesRecipes

Salmon Burgers with Roasted Asparagus & Crispy Penne photo by Matt Haas

This meal shouldn't take more than 30 minutes from start to finish.  If it does, it means your kind of a hack.  That's ok.  Keep practicing and you'll be whipping up meals like this in no time.  
Serves 2


Ingredients:

2 Trident Brand Salmon Burgers (available at Costco, as well as Smart & Final if you don't have the card!).  Any brand will do, but these are the best I've ever tasted, by far.

20 Asparagus Spears

1.5 C Uncooked Penne (whole wheat, if that's your thing. Yes, it's my thing)

Spices from the Pantry: Lemon Pepper, Crushed Red Pepper, Dried Oregano, Salt, Pepper, Seasoning Salt)

Parmesean Cheese, grated


Directions:

Preheat oven to 450 degrees F  

1: Boil water for the penne (don't forget to salt it)

2: While the water boils, prep & peel the asparagus (first snap the asparagus 1-2 inches from the non-fancy end. Then peel the bottom 2/3's of each spear, which gives the asparagus a much more tender texture and reduces the cooking time a little. Skip the peeling part if you are lazy)


photo by Matt Haas

3: Arrange the asparagus spears on a roasting pan and brush with a little olive oil and season with Salt & Pepper. Roast in the oven for about 10 minutes, until tender but al dente.

4: Drop the pasta in the boiling water and cook until done (8-10 minutes)

5: While the pasta and asparagus cooks, lightly season the salmon burgers with lemon pepper or seasoning salt and cook 4 minutes per side in a hot skillet. 

6: While the pasta and burgers are cooking (don't forget to use timers, people), heat 1-2 tbsp olive oil in another skillet.


photo by Matt Haas

7: When the pasta is done, drain and add to the hot pan with olive oil. While it gets crispy on the bottom, season generously with dried oregano, red pepper flakes, seasoning salt, pepper and parm. Toss then let it continue to crisp while the burgers and asparagus finish cooking.

8: Plate and enjoy!    


Notes: If you've never roasted asparagus before, this is by far the best way to cook it. Roasting it caramelizes the natural sugars and the end result is heavenly.

I switched to whole wheat pasta 2 years ago and haven't looked back, especially for this dish. I think you can buy salmon burgers in a variety of places, but the Trident brand is killer. If you don't use this brand and this dish flops, don't blame me.

Finally, as far as the seasoning salt, I use Jamaica Me Crazy brand from Seattle. My mother-in-law brings it to us in bulk and it's the best. I'm sure there are other brands out there that are almost as good.


Posted
AuthorMatt Haas
CategoriesRecipes

photo by Dave Koch

Adapted from Ina Garten's Chocolate White Chocolate Chunk Cookies from her book Barefoot Contessa Parties!  I cut the recipe in half (because it makes 40 cookies) and instead of putting all the white chocolate chips in, I used half macadamia nuts from our friend's tree on the Big Island of Hawaii...

You can just buy some macadaima nuts from the store if you don't know anyone with their own tree.

Ingredients

  • 1/4 pound unsalted butter at room temperature
  • 1/2 cup light brown sugar, well packed
  • 1/2 cup granulated sugar
  • 1 teaspoons pure vanilla extract
  • 1 large eggs
  • 1/3 cup unsweetened cocoa powder
  • 1 cups all purpose flour
  • 1/2 teaspoon baking soda
  • 1/2 teaspoon kosher salt
  • 3/4 cup white chocolate chips
  • 3/4 cup macadamia nuts

Directions

Preheat the oven to 350 degrees F.

Cream the butter and sugar in a bowl of an electric mixer with a paddle attachment. Add the vanilla, then the eggs until incorporated well. Stop the mixer, add the cocoa continue. 

Sift together the flour, baking soda, and salt into another bowl. Slowly add the dry sifted ingredients to chocolate batter with the mixer on low. Stop the mixer, pour in the macadamia nuts and white chocolate chips, and mix again briefly.

Drop about a tablespoon of dough for each cookie on a baking sheet with a Silpat (or lined with parchment paper).

With your fingers, press down each cookie slightly and top with a few more white chocolate chips.  Bake for 12-15 minutes.

Remove cookies from the oven and allow to cool a few minutes on the pan as they will still be a little soft.  Transfer to a wire rack to cool completely. 

Posted
AuthorAmy Koch

photo by Loren Tama

8 large flour tortillas (corn would be nice, but hard to find in London)
Salt and pepper
Cut the tortillas into smaller rounds using a metal ring or a sturdy water glass.  


For the chicken
1 small roasted chicken 
1 cup (about 3/4 of a whole) ripe pineapple, diced into 1/4 inch cubes
1 cup (about 1 large fruit) ripe mango, diced into 1/4 inch cubes
1 yellow onion, diced
Cilantro, de-stemmed and coarsely chopped to yield about 1/4 cup loosely packed
Juice of 2 limes
1 jalapeno, cut into thin rounds

Remove the skin from the chicken and pull the meat off into bite-sized shreds.  Season liberally with salt and pepper and mix the meat with your hands to evenly distribute the seasoning and to mix the dark and white meat.  Set aside.  

Gently combine the pineapple, mango, onion, cilantro, and lime juice.  To assemble the tacos, place a small amount of chicken on each mini tortilla followed by a small spoonful of the salsa.  Set one slice of jalapeno on top of each.

For the beef
1/2 lb ground beef
Taco seasonings: chile powder, cumin, paprika, onion powder, oregano, bay, etc...use your imagination
5 large cloves of garlic, minced or pressed
1 medium red onion, diced
2 8-oz cans chipotle peppers in adobo sauce
Shredded cheese (I used cheddar)

Sweat the onion in a large skillet over medium heat.  Add the beef, stirring occasionally and breaking it up with a wooden spoon or spatula.  When the meat starts to brown, add garlic and seasonings, stirring to combine.  Add the chipotle peppers and adobo from the can, again stirring to combine. 

Simmer over low heat, stirring occasionally, for 15 minutes.  Remove from heat and drain the meat mixture.  Remove any chipotle peppers that have not broken up, and any bay leaves if used, and season with salt and pepper to taste. Allow to rest at room temperature until the mixture can be handled by hand.  

To assemble the tacos, place a small amount of the beef mixture in the middle of a mini tortilla and sprinkle with shredded cheese.  

Keep the assembled tacos in the fridge before serving.  You can make them up to 8 hours in advance, but longer storage may lead to sogginess.  Head the beef tacos in the microwave prior to serving; the chicken tacos are delicious cold. 

Yields about 50 miniature tacos.


Posted
AuthorLoren Tama
CategoriesRecipes
4 CommentsPost a comment

Since my earlier attempt at making Kombucha from scratch was a total failure, I ordered a scoby online.  This makes sense to me because virtually all things fermented are started with leftovers from the last batch; think sourdough, brewers yeast, and vinegar.  From generation to generation, these "starters" were passed on.  The exception being Lambic, which is traditionally allowed spontaneous fermentation, but that's another story...


What arrived was a 1 inch thick gelatinous mass called a scoby (symbiotic culture of bacteria and yeast).  It may have cost me $10 after shipping and handling.  I brewed up a gallon of tea with 7 Lipton Original tea bags and a cup of sugar.  I waited for it to cool to room temperature so that the heat does not harm the scoby, and I dropped it into a 1 gallon glass jar.


I covered it with some cloth (or you could also use a coffee filter) and secured it well with a rubberband.  Within a few days, a new, much thinner scoby began to form on the surface.  After about two weeks I used a straw to push aside the new scoby and tasted it like a bartender, capping the straw with my finger.

Once it was ready I strained it into a pitcher.  With the pitcher it was easier able to pour into sanitized stopper-top beer bottles using a funnel .  If you like your kombucha sweeter, don't let it ferment as long - the longer you let it go, the more sugar is converted into acetic acid (vinegar).

I used the stopper-tops because they are less likely to explode if too much pressure builds inside (see the bottle above, like the brands Grolsch or Fischer).  With a standard bottle cap, supposedly this can occur, or the caps shoot off making kombucha geysers in your cabinet.

Another week in the bottle allows the kombucha to carbonate itself naturally (like Krausening beer).  The result is a slightly sweet and tangy carbonated iced tea.  There is nothing similar to compare it too, kombucha really is in a category of its own.

In my second batch, I experimented by adding the juice of a large ginger root.  I shreded the whole root with a microplane (there's no need to even peel it), picked it up with a clean hand and squeezed the juice out.  Holy schniekies, this is the way to go!  Granted, I'm a ginger-freak who never leaves any left at the sushi bar, but this is an invigorating drink.  Ginger kombucha comes HIGHLY RECOMMENDED.

I'm going to try upping the sugar this next round in order to make something even more tart.  I'm going to add more tea as well.  The current recipe is very good and quite refreshing, but I desire something with a little more umph.  I'm also going to experiment with different additions, herbs, spices, etc. in the coming weeks.  Maybe mint next!

Making Kombucha from a purchased scoby is incredibly easy - just keep everything sterile.  I use an industrial strength, iodine-based sanitizer, but you could also use a diluted bleach solution.  Before you begin, I suggest that you read the following websites very carefully - and take notes:

Kombucha and Vinegar Making - by Dominic N Anfiteatro

Making Kombucha  Mushroom Tea - by The Happy Herbalist

How to Make Kombucha - by Seeds of Health


Posted
Authordavid koch
CategoriesDrinks, Recipes
2 CommentsPost a comment


I am honoring the Patron Saint of Rustic Food and Booze: Good Old Saint Patrick. Tonight in his honor, I am making one of my all-time favorite peasant dishes, Shepherd’s Pie.

Shepherd’s Pie is traditionally made from ground leftover lamb, mixed with veggies, topped with mashed potatoes and browned to perfection under the broiler. Since I didn’t have leg of lamb for dinner last night, I’m using lean ground beef mixed with pan roasted veggies and topped with silky mashed russet potatoes.

This is a peasant dish that is really hard to mess up. Cook with good ingredients and a little skill and you’ll end up with a hearty and delicious meal. Feel free to add peas and/or mushrooms, which are pretty traditional. My wife isn’t a fan of peas, so I’ve chosen to omit them; and I normally would have used mushrooms sautéed with the mirepoix, but I forgot.

Ingredients:

  • 4 Russet Potatoes
  • Half a stick of Butter
  • Less than 1 cup Half & Half
  • Salt
  • 2 LBS. Ground Meat
  • 1 Yellow Onion, medium dice
  • 2 LG Carrots, medium dice
  • Olive Oil
  • Fresh Herbs (I’m using thyme and oregano from my garden), chopped fine
  • ½ Cup Worstershire Sauce
  • 1-2 Cups Red Wine


1: Make your mashed potatoes- clean and wash the potatoes, cut and half and cook in cold water over high heat until very tender. I cook the potatoes in very large chunks, which results in a less water logged spud.

2: Using a ricer, rice the potatoes smooth and add half & half, butter, salt and pepper until silky smooth and well seasoned. If you don’t have ricer, mash with a regular masher. The ricer gives the finished product a silky texture that I love.


3: Cook the onions and carrots in olive oil until nicely browned. You want a nice carmelization on the mirepoix for best flavor. Once the veggies are golden, add the meat, Worcestershire sauce and red wine and cook for about 20 minutes, mixing well and reducing the cooking liquid until you have a rich, meaty stew. Remove from heat and put in an oven-proof roasting dish. For this amount of pie, I like to use a deep 9” x 9” dish.


4: Preheat your oven to Broil.  Top with mash potatoes and cook in the broiler until golden. Serve with a nice green salad and a glass or Magner’s Hard Irish Cider on ice and enjoy!


5: Éirinn go brách!


Posted
AuthorMatt Haas
CategoriesDrinks, Recipes
2 CommentsPost a comment

Chicken Cacciatore with Roasted Herb Potatoes

Chicken Cacciatore is traditionally made with a whole cut up chicken, bone-on. I adapted this recipe from Giada De Laurentiis, but I used boneless breast meat only, added some vegetables, and omitted the capers.

Chicken Cacciatore

  • 4 chicken breasts (boneless, skin-on)
  • 1/2 cup all purpose flour
  • 2 tablespoons olive oil
  • 1 cup yellow onion, chopped
  • 1 red bell pepper, chopped
  • 1/2 pound cremini or white button mushrooms, thinly sliced
  • 1 tablespoon garlic, minced
  • 1/2 cup dry white wine
  • 1 (28-ounce) can of diced tomatoes
  • 1 cup chicken broth (reduced sodium is best)
  • 1/3 cup kalamata olives, pitted and halved
  • 2 teaspoons dried Italian seasoning
  • 1/3 cup basil, chiffonade
  • 1/2 cup mozzarella cheese, shredded (optional)
  • Salt and pepper to taste


Place flour in bowl or shallow pan. Sprinkle chicken breast with salt and pepper, plus add about 1/2 tsp salt and 1/4 teaspoon pepper to flour. Lightly coat each chicken with flour mixture.

In a large saute pan or dutch oven, heat oil over medium-high heat. Once oil is hot, add chicken breast to pan and sear until golden brown, about 3-4 minutes per side. Remove chicken from pan and transfer to plate.

If pan is dry add another teaspoon of oil, then add chopped onion and bell pepper to pan and saute for 3 minutes. Add mushrooms and garlic to pan and continue to saute vegetables until soft. Season with additional salt, pepper, and the dried italian seasoning.

Add wine, being sure to scrape up any bits on the bottom of the pan, and reduce by half. Add tomatoes with their juices and the chicken broth. Let sauce come up to a simmer, then place chicken back into the pan along with any juices. Allow sauce to continue a simmer until chicken has cooked through, about 20-30 minutes.

Once chicken is cooked, remove from sauce and transfer to platter. If sauce is too thin, continue to simmer on medium-high heat until it thickens. Stir in olives and basil and spoon sauce over chicken. Garnish with some additional basil and mozzarella (if using). Serve with roasted herb potatoes.


Roasted Herb Potatoes

  • 2 pounds small white or red potatoes
  • 1 teaspoon fresh thyme
  • 1 teaspoon fresh rosemary
  • 1/4 cup olive oil
  • salt and pepper


Preheat oven to 375 degrees.

Wash and dry potatoes, then cut in half or quarters, depending on the size. Remove thyme and rosemary leaves from stem and finely chop. Place potatoes in large bowl, add olive oil to coat, add fresh herbs, and sprinkle with salt and pepper.

Toss ingredients well and pour on to a baking sheet. Roast in the oven for 30-45 minutes or until potatoes are cooked through and beginning to brown. Toss potatoes half-way during cooking so they do not stick to the pan. Serve warm.

Serves 4-5


Posted
AuthorAmy Koch
CategoriesRecipes

This got whipped up the other night after a long, stressful week.  Neither of us wanted to cook anything so we picked up some rolls and a pre-roasted whole chicken from the supermarket.  I went straight for the Dutch Crunch - she got the Ciabatta.

It got put together in a jiffy; it's healthy, scrumptious, and satisfying.  This is all we had for dinner and we were both satiated.  The grapes add a coolness, a novel texture, and some acidity.  The tiniest touch of curry powder is barley noticeable but brings a depth that would be lacking without it. 

Chicken Salad with Grapes - Recipe by Amy Koch

Filling


  • 2 boneless/skinless chicken breasts (or pull them off a pre-roasted bird)
  • 1 stalk of celery, chopped fine
  • 4 green onions, sliced thin
  • 1 cup of red grapes, quartered
  • 2 Tablespoons chopped flat-leafed parsley


Dressing


  • 1/2 cup sour cream, we used low-fat
  • 1/2 cup mayonnaise, we used low-fat
  • 1 Tablespoon fresh squeezed lemon juice
  • 1/2 teaspoon curry powder
  • Salt & pepper to taste


Bring the filling together in one bowl.  Combine the ingredients for the dressing in another.  Fold the dressing into the dry filling.  Lightly toast some rolls, like Ciabatta or Dutch Crunch, add some mixed greens.  Enjoy.  


Posted
Authordavid koch
CategoriesRecipes