Celebrichef Joanne Weir served this up to my wife for breakfast the other day and she whipped up some for me.  It is delicious and light, and at the same time satiating.  It only takes minutes to prepare and can keep you energized for hours.

Apples and Yogurt

  • 1 apple per person
  • 1 cup of plain yogurt (Greek-style is tasty)
  • 1/4 cup of slivered almonds
  • dusting of cinnamon to taste

Cut apples into bite sized pieces - preferably Pink Lady Apples which I describe as firm but not hard, and tart but not sour.  Add the yogurt and slivered almonds on top.  Dust with cinnamon.  Enjoy.


Interestingly enough the term "Pink Lady" is a registered Trademark of Apple and Pear Australia Limited.  The cultivar is the result of hybridizing the Golden Delicious and the Lady Williams and is experiencing a boom of sorts.   It was developed by John Cripps in the 1970's and read below how complicated the fruit industry has become... (from Wikipedia)

"The Cripps Pink variety is owned and licensed by the Department of Agriculture and Food, Western Australia (DAFWA), which has Plant Breeders' Rights in multiple countries.

The peak industry body for Australian apple and pear growers - Apple and Pear Australia Limted [sic] (APAL) - owns and manages globally the intellectual property in the trade mark PINK LADYTM, which is registered in more than 70 countries.

Only the highest quality grade of apple can be sold under the trademark of PINK LADYTM."

When they mention how only the highest quality grade can be sold as "Pink Lady" - according to Orange Pippin, 65% of annual production does not meet the standards and are then sold under the name Cripps Pink.  They are the same variety.

Posted
Authordavid koch

When I saw this I couldn't stop laughing.  Yes, laughing out-loud, and to myself.  It epitomizes everything gluttonous and outrageous that America still has left to stand on.  It is so unapologetically both panache and bas-cuisine.

Imagine Vodka meets Ronald McDonald; first they try to make small talk, then they go out to dinner.  Drinks ensue.  In the end, Ronald's red Afro gets caught on fire as he goes running down Sunset Boulevard screaming something about how the Filet-O-Fish was for Catholics.

When Vodka and Mr. McDonald cross paths again, (at a casting call for Celebrity Fit Club 4, no less) several weeks later, referring to the moment as "awkward" would be like calling Chernobyl a "wardrobe malfunction." They decide to never enter the same state together again, but they do; however, agree on one thing.  The subtle nuance behind a well-made McNuggettini.

The McNuggetini is the result of months of hard work. 

(via thisrecording.com) - by Georgia Hardstark


"McNuggitini

Recipe by Alie and Georgia

Prep Time: 5 minutes
Cook Time: 0 minutes
Yield: 2 servings

Ingredients:

2 McNuggz (plus more for snacking)
1 tub McDonalds Brand Barbeque Sauce (plus more for licking off pinky finger)
1 lg. Mcdonalds Brand Chocolate Milkshake (plus more for bringing all the boys to the yard)
1 bottle Vanilla Vodka (recommended brand: Absolut)

Open the McDonalds bag. Eat one McNugg each, followed by two bites of the Filet-o-Fish (make sure you don’t tell anyone that you eat Filet-o-Fishes).

Mix three or four shots of vanilla vodka in the McDonalds Brand Chocolate Milkshake, followed by one shot each directly into your mouth.

Rim each martini glass with McDonalds Brand Barbeque Sauce, and pour milkshake/vodka mixture into the glass. Garnish with a McNugg (which is to be swiped along barbeque sauce rimmed glass after the milkshake has been finished, and consumed with pure, unadulterated glee)."


Posted
Authordavid koch
2 CommentsPost a comment


What a great meal for a dark and stormy night.  The mushrooms and the peas add a wholesome goodness to the body of the pasta and the chicken.  We lightened up the cream sauce a little from the original and it was still plenty umptious.  The Parmesan and the breadcrumbs add a little crunchy topping for that extra touch of texture.  

This is adapted from Giada De Laurentiis' Chicken Tetrazzini: Giada's Family Dinners.


Ingredients

  • 9 Tbs butter
  • 2 Tbs olive oil
  • 4 chicken breasts on the bone with the skin
  • 2 1/4 tsp salt
  • 1 1/4 tsp freshly ground black pepper
  • 1 pound sliced white mushrooms
  • 1 large onion, chopped fine
  • 5 cloves garlic, minced well
  • 1 Tbs chopped thyme leaves, fresh
  • 1/2 cup white wine
  • 1/3 cup all-purpose flour
  • 4 cups whole milk at room temperature
  • 1/2 cup heavy whipping cream at room temperature
  • 1 cup chicken broth
  • 1/8 tsp ground nutmeg, freshly ground is best
  • 12 ounces linguine
  • 3/4 cup frozen peas
  • 1/4 cup chopped fresh Italian parsley
  • 1 cup grated Parmesan
  • 1/4 cup Italian-style breadcrumbs

Directions

Preheat the oven to 350 degrees F.  Season the chicken breasts with salt, pepper, and olive oil and roast for about 35 minutes.  Allow to cool a bit and shred with your fingers or two forks.  Put the chicken into a bowl and set aside.

Butter the inside of a 13 by 9 by 2-inch baking dish. 

Add 1 Tbs each of butter and oil to a pan.  Add the mushrooms and sauté over high heat until the mushrooms soften and start to become golden, about 10 minutes. Then add the onion, garlic, and thyme, and sauté until the onion is translucent, another 8 minutes or so. Add the wine and simmer until it evaporates. Transfer the mixture to the bowl with the chicken.

Melt 3 more Tbs butter in the same pan over medium-low heat. Add the flour and whisk for 2 minutes to make a light roux. Whisk in the milk, cream, chicken broth, nutmeg, 2 tsp salt, and 1 tsp pepper. Increase the heat to high. Cover and bring to a boil - then simmer, uncovered, until the sauce thickens slightly.  Whisk often (about 10 minutes).

Bring a large pot of salted water to a boil. Add the linguine and cook until it is tender but but not mushy, about 9 minutes. Drain water. Add the linguine, sauce, peas, and parsley to the chicken and mushroom mixture. Toss until the sauce coats everything well..

Transfer the chicken and pasta mixture to the prepared baking dish. Mix the cheese and breadcrumbs and sprinkle the over the pasta. Dot with the remaining 3 tablespoons of butter. Bake uncovered until golden brown on top and the sauce begins to bubble, about 25 minutes. 

Posted
AuthorAmy Koch
CategoriesRecipes


These were amazing!  The meat was flavorful, and had just the right texture; tender, but not without a slight chew to it.  You could taste the cumin and chili, and though it wasn't distinct, the bay leaves added another earthy note.  The recipe made plenty and we reheated it two days later and I think it may have been even better.

Adapted from the recipe Mexican Pot Roast Tacos in Tyler Florence: Dinner at My Place.

  • 2 pounds beef chuck roast
  • Kosher salt to taste
  • Ground black pepper to taste
  • Extra-virgin olive oil
  • 2 cloves garlic, smashed
  • 1 large onion, sliced
  • 1 (28-ounce) can crushed tomatoes
  • 1 Tbs ancho chile powder
  • 1 Tbs cayenne pepper
  • 1 Tbs ground cumin
  • 3 bay leaves
  • fresh corn tortillas
  • cups shredded iceburg lettuce
  • 2 cups queso fresco, crumbled

Directions

Preheat oven to 300 degrees.

Season all sides of the beef with salt and pepper. In a large Dutch oven, or other heavy pot on moderately high heat put 2 tablespoons of olive oil and brown all sides of the meat.

Add the onions and saute until soft,  add smashed garlic and saute for an additional minute. Then add the crushed tomatoes and all spices.  Fill the pot with water until it just covers the meat and bring to a simmer.  

Cover and place in a 300 degree oven for about 3 hours or until the meat is fork tender. Let the meat cool in the liquid. Once it is cool, shred meat with two forks.  Set aside.


Assemble the tacos:

Lay some shredded beef as a base inside the corn tortilla. Top with queso fresco, salsa (homemade or the stuff from the deli section beats jarred hands-down), and shredded lettuce. If you like additional heat try some hot sauce like Castillo's Salsa Habenera Orange (careful, it's extremely HOT).  Garnish with fresh cilantro leaves, unless like my father-in-law, you're a member of the I Hate Cilantro Community...


Posted
AuthorAmy Koch
CategoriesRecipes

Healthy, easy, and delicious.  Party snacks need to be more salubrious and we need options with more pizzazz; this delivers on both.  The smidge of raw garlic goes a long way, tamed by the cool yogurt, and balanced by the sun dried tomatoes.  Feta adds body and saltiness.

The Dip:

Everything is going to be blended, so a coarse chop is fine. 

  • 1 whole Roasted Red Bell Pepper
  • 1/2 cup of plain yogurt
  • 1/3 cup of crumbled Feta
  • 1/4 chopped walnuts
  • 1 Tbs of chopped sun dried tomato (packed in oil)
  • 1 tsp chopped garlic
  • juice of 1/2 lemon
  • pinch of black pepper 

Toss into blender and puree until smooth.


Pita Chips:

Cut 3 pita rounds into 8ths and pull apart the halves of each triangle (whole wheat pita makes a healthier option).  Toss with about 2 Tbs olive oil, 1 tsp salt, 1/2 tsp ground black pepper, and 1/2 tsp ground cumin (adjust to taste).  

Bake on a sheet pan at 350F until nice and toasty, about 10-15 minutes.

Keep the dip refrigerated and in an air tight container for up to three days.  The pita chips in a zip-top bag will remain crispy at room temperature for up to four.  Enjoy!

Posted
AuthorAmy Koch
CategoriesRecipes

Homemade Buttermilk Biscuits with BBQ pulled Turkey - photo by my amii

I really wanted to make Pulled BBQ Turkey for a healthier option to pulled pork.  However, I looked all over the internet and could not find a recipe which I wanted to imitate.  I've made Emeril's BBQ Pulled Pork before, which turned out great, so I used the same principles (specifically, the wet basting sauce) and incorporated them into my own turkey version.

Pulled Turkey with Homemade BBQ Sauce

3-4 lb turkey breast, on the bone with skin
2 tsp salt
1 tsp pepper
1 tsp paprika
1/2 tsp cayenne

Wet Basting Sauce adapted from Emeril Lagasse 
1/2 cup white vinegar
1/2 cup apple cider vinegar
1 T red pepper flakes
1 T salt
1/2 T pepper

Barbecue sauce
3 T butter
1/2 of a yellow onion, finely chopped
1 tsp garlic, chopped
1/2 cup ketchup
1 cup apple cider vinegar
2 T Worcestershire sauce
3 T brown sugar
3 T mustard powder
2 tsp smoked paprika
1/4 tsp cayenne
1 cup water
1 T tomato paste


Preheat oven to 300 degrees.

Place the seasonings for turkey (salt, pepper, paprika and cayenne) in small bowl.  Rub spice mixture on turkey - be sure to rub under the skin while leaving skin in tact. Let marinate for 30 minutes.

Prepare wet basting sauce:  Combine vinegars, red pepper flakes, salt and pepper and whisk to combine flavors.

Barbecue sauce: Saute onions in butter until soft, add garlic and sauté for 30 more seconds.  Add ketchup, cider vinegar, brown sugar, Worcestershire, mustard powder, paprika, cayenne, water and tomato paste.  Let simmer for 30 minutes. Puree with blender (emersion or regular), and add back to pot. Taste and adjust seasonings.  NOTE: This sauce is a sweet style barbecue.  If you prefer a spicier sauce try adding 1 T chipotle in adobe sauce to mixture while simmering.

Place seasoned turkey in a baking dish and cover with foil. Roast in oven for 20 minutes, then baste with wet sauce, continue basting every 20-30 minutes.  Slow roast turkey for about 2 hours. Once cooked, remove turkey to cutting board and let cool. Discard skin and bones and shred turkey meat.  Pour prepared BBQ sauce over shredded meat.

Serve on buns with pickles and coleslaw.

Serves 4

Posted
AuthorAmy Koch
CategoriesRecipes
2 CommentsPost a comment


Sometimes you are working on a dish and you catch yourself tasting it over and over again, searching for that je ne sais qua - you think it needs something but you just can't figure out what.  It is usually part of the foundation that is off; maybe salt, maybe acid or pepper.  

Other times it is depth you are looking to add, or possibly the fifth taste, umami.  From the kitchn comes these Eight Ways to Build Flavor.  They are worth repeating and we've added some of our own too.  You can't have enough tricks for bringing out flavor in your repertoire.

1. Searing the Meat - When cooking meat, taking time to sear the outside will add a heavenly depth of flavor to your final dish.

2. Deglazing the Pan - That dark layer at the bottom of your pan might look like burned food, but it's actually caramelized bits from everything you've been cooking. Once they've been deglazed, these bits melt into the background and form a savory flavor base in your dish.

3. Caramelizing the Onions - Like searing and deglazing, caramelizing onions and other vegetables by cooking them slowly gives your dish depth and adds interesting smoky and nutty flavors to your dish.

4. Toasting the Spices - This brings out the natural oils in the spices and boosts their aroma in the final dish. It's most effective to toast whole spices and then grind them.

5. Reducing the Sauce - Reducing concentrates all the flavors in a sauce. High, middle, and low notes become heightened, which enhances the overall taste of the sauce.

6. Salting to Taste - Salt reduces our perception of bitterness in dishes. If you've already added all the salt called for in the recipe, try adding a half teaspoon of salt or more and then see if you notice a difference.

7. Adding acidic and spicy ingredients - These also accentuate the high notes. If you've already added salt and you still think your dish needs "a little something," try adding a squeeze of lemon, a splash of vinegar, or a few shakes of Tabasco sauce.

8. Adding a splash of wine - Similar to adding an acidic ingredient, a splash of red or white wine can brighten the flavors in your dish.


We came up with Our Own 8 Ways to Build Flavor:

1.  When you season with salt and pepper, season each layer - When you start with the onions, season.  When you add the carrots, season again.  When you add the potatoes, season again.  

2.  Bacon - This adds a layer of smokiness and saltiness along with pure unadultered porky goodness.  Few dishes do not improve with the addition of bacon.

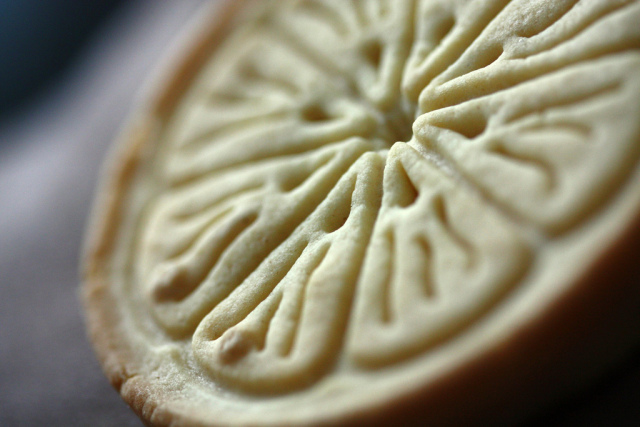
3.  Zest - The zest of citrus adds a piquant quality without actually adding acid.  Think outside lemon and lime too; a little orange or grapefruit zest can go a long way.

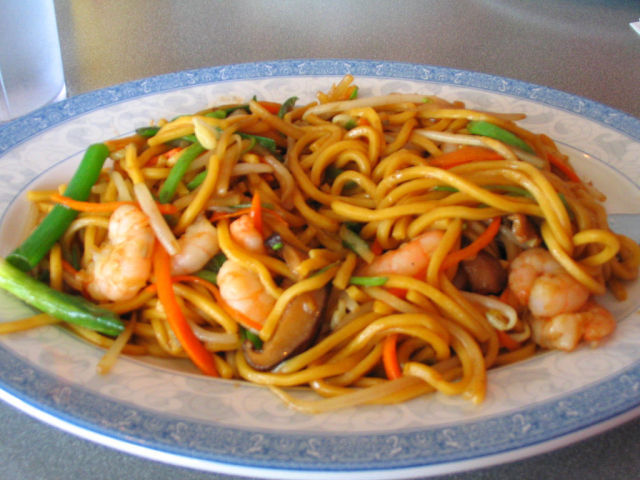
4.  Soy Sauce - this is a shortcut to bringing umami to the party, just keep in mind that soy sauce is also quite salty.  Soy sauce has almost the same sodium content of kosher salt by volume.  So that you don't over do it, add a touch in the beginning.  Low sodium soy sauce has on average 1/3rd less.

5.  Bouillon - We especially like the "Better than Bouillon" brand.  Keep in mind that every teaspoon adds another 250mg of sodium (or about 1/5th a teaspoon of kosher salt).  I often make vegetable soup just by sauteeing veggies, and throwing them in a pot with some bouillon.  Magnifique!

6.  Paprika - Along the flavor profile of black pepper, paprika adds a spicy, an earthy component; and if you use a smoked paprika, a smoky component too.  It also adds a bright ruddy color too which, keep in mind, may not go well with some dishes like a cream sauce. 

7.  Herbs - Adding fresh herbs right at the end of cooking or as a garnish brings bright notes and a blast of color.  Surprisingly enough, flat leafed parsley can be added to almost anything.

8. Chocolate - The cacao brings to the table an earthiness that adds a richness to savory flavor that, when used in moderation, most people cannot recognize but find delicious.  It is my secret ingredient in many of my stews and my chili; shh, don't tell anyone.

What other ways do you build flavor in your cooking?

Posted
Authordavid koch

Ital Cuisine photo by svacher

Today, February 6th, is Bob Marley's birthday and it would have been his 64th.  I thought today would be appropriate to investigate Rastafarian Cuisine, also known as Ital (from vital).  The Ital diet adheres to Biblical guidelines, mostly GenesisDeuteronomy, and especially Leviticus.  Ital dietary guidlines are, like anything else, open to many different interpretations.  

At it's core, Rastafarian diets are essentially composed of foods that are fresh and natural; avoiding chemicals, additives, coloring, flavoring, and preservatives.  Most Rastafarians also do not consume coffee, alcohol, cigarettes, or even Western medicines.  

Herbs, however, are GRAS (Generally Regarded As Safe: an FDA term).  Many Rastafarians are vegetarian, but those who do not abstain from all meat generally avoid pork, shellfish, and often red meat.  Those who do eat fish, generally avoid fish more than 12 inches long.

Most also take measures to avoid consuming metal.  In order to avoid metal, some Rastafarians avoid cooking and serving food in metal vessels, and some even avoid metal eating utensils.  For the same reason, some also avoid foods that have been canned.  

Many avoid preparing food with salt and/or oil.  What's left you ask?  The bulk of their diet consists of fruits, vegetables, and whole grains.  I found this recipe on Jamiacans.com:

ITAL SWEET POTATO PUDDING

Ingredients:

  • 1lb 8ozs to 1lb 14ozs sweet potato (I used 1lb 14ozs in this Pudding)
  • 3 cups coconut milk
  • ½ tsp cinnamon
  • ½ tsp ground ginger
  • ½ tsp grated nutmeg
  • 1 ½tsp vanilla essence
  • 1 to 1 ¼4 cup brown sugar
  • 2 cups soaked raisins (I have mine soaked in Sherry for over 5 years now. I top it off with more Raisins, Prunes and Sherry every time it gets too low in the bottle.)
  • ½ - 1 cup flour (More or less flour will make it firmer or less so I used half a cup)
  • 5ozs Beet Root or Carrots (optional)

Method

  1. Puree sweet potato and coconut milk in blender
  2. Pour mixture into a bowl
  3. Dice beet root
  4. Add all the ingredients to the bowl. Mix and pour into a well greased 8" or 10" round tin
    (vegetable shortening to grease the tin)
  5. Bake at 350F for 1 ½ hours then 300F for 25 mins
  6. Remove from the oven immediately.
  7. Best eaten the next day or at least 5 hours after cooking.
  • The pudding sets as it cools.
  •  

    And this book, specifically on Rastafarian Cuisine.


    Posted
    Authordavid koch
    2 CommentsPost a comment

    Mrs. Solanki’s Chicken Curry photo by Loren Tama

    My friend and co-worker, Milan Solanki, upon hearing that I had never cooked Indian curry before, provided this spectacular recipe from his own mother.  Other Indian friends have since bashed the recipe for its authenticity.  I have since learned that, to an Indian, the only truly “authentic” curry recipes are those cooked by one’s own mother.  Here is Mrs. Solanki’s recipe, copied exactly as it was provided to me:

    • 1lb chicken fillet cut into 1inch cubes
    • 3 tblspn olive oil
    • 2 medium size onions sliced thinly
    • 3 cloves
    • 1 small piece of cinnamon
    • 3 black peppercorns
    • 1/2 tspn crushed ginger
    • 1/2 tspn crushed garlic
    • 1or 2 green chillies cut in half length wise
    • 1tspn salt ( or to taste)
    • 1/4 tspn turmeric powder
    • little less than half a can of peeled tomatoes (liquidised)
    • 2 tspn coriander and cumin powder (buy it ready in shops namely dhana-jeera powder)
    • handful of fresh coriander roughly chopped, washed and drained
    • 1 tspn garam masala (readily available in indian shops)
    • 2 tspn lemon juice

    Heat the olive oil in a saucepan add the slit chillies, cloves, cinnamon, peppercorn and then add the sliced onions.   Fry the onions until golden brown,

    **add the chicken and stir gently for couple of minutes until the chicken is coated completely with the onions and olive oil,  add all the spices upto and including turmeric power and again stir and mix it in to the chicken, add half a cup of water, cover the lid and let it simmer (you can add more water if it looks too dry)  for 15 to 18 minutes add the tomatoes and again let it simmer for 3 minutes then sprinkle the garam masala and mix, add the lemon juice and after a minute take it off the flame add chopped coriander just before serving.

     ** variation for methi (fenugreek leaves) chicken.  add the washed and roughly chopped methi after the onions have browned and before adding the chicken.  Stir fry the methi with the onions for 2minutes then add the chicken and continue as above.

    All the above spices can be adjusted according to your taste after making it a couple of times. Also how runny or dryish - add water accordingly.


    Posted
    AuthorLoren Tama
    CategoriesRecipes

    Nobody Doesn't Like Grilled Cheese - photo by BrittneyBush

    It's winter and nothing is more comforting than grilled cheese sandwiches and tomato soup.  I've been running into quite a few grilled cheese recipes in different places lately so I decided to consolidate some of the more unique ideas I've found for bringing one to life.

    On Yahoo Food, there is a list of their 10 tips for making a great grilled cheese.  To paraphrase them: 1. Grate the cheese, instead of slicing it. 2. Use a lot of cheese.  3. Don't worry about cheese oozing out the sides.  4. No white bread (but who uses that anymore?).  5. Slice your bread thick (but who slices bread anymore?).  6. Smush the bread with a spatula.  7. Butter the bread (obvious).  8. Use salted butter (if you even have some, but who keeps that?).  9. Use a non-stick.  10. Cover the pan with a lid.

    I think we can take this one step further.  From Saveur's Ultimate Grilled Cheese Sandwich they declare simply, "The secret to making a perfect grilled cheese sandwich is cooking it over low heat, which brings out the subtle flavors of a cheese, and slathering the bread with butter, which crisps it in the pan."  

    They also bring us our first tip:

    1. Use Comté instead of the usual Cheddar.

    2.  Use artesian or specialty breads like walnut bread, olive bread, etc.  Or, use the ubiquitous Ezekiel Sprouted Grain.  When you've only got two ingredients, bread and cheese, you can't skimp on either.

    3. Spread mayo on the side of bread to fry instead of butter, this makes it crispier.  "Really?"  "Yes, it's wonderful."  Although I love my Miracle Whip, I wouldn't substitute it here.

    4.  Add sliced tomato and some fresh basil inside.

    5.  Add thinly sliced apples.

    6.  Don't forget your salt and pepper.

    7. Use a really piquant mustard, like Philippe's, or try a A World of Mustard Collection.

    8. Put a slice of roasted red bell pepper inside, mmm.

    9.  Simultaniously use two really hot cast iron pans and use the bottom of one to squish and fry the top of the grilled cheese while it rests in the other.  This is a great technique for banging out a large quantity of sandwiches in half the time.

    10. Make it with an iron.  "Set your iron to the highest setting, usually cotton."


    - Dave Koch

    Posted
    Authordavid koch
    CategoriesRecipes

    Shrimp Lo Mein - photo by absentmindedprof

    Chef Amy Koch adapted this from 1,000 Lowfat Recipes by Terry Blonder Golson (GREAT book), there are a ton of veggies which add color and crunch.  You can easily substitute your favorite veggies, like she did.  Use the recipe as a guide and make it your own.  

    Awesome Shrimp and Vegetable Lo Mein

    • 1 teaspoon finely grated ginger
    • 2 tablespoon rice vinegar
    • 3 tablespoon soy sauce
    • 1/4 teaspoon toasted sesame oil
    • 1/2 cup chicken broth (preferably low-sodium)
    • 2 teaspoon cornstarch
    • 1/2 teaspoon of chili garlic sauce


    • 1 carrot, shredded
    • 1 red bell pepper, julienne
    • 1 yellow bell pepper, julienne
    • 1 cup snow peas, ends and strings removed, julienne same width as bell peppers
    • 3 scallions, sliced
    • 1 cup fresh bean sprouts
    • 2 tablespoon vegetable oil
    • 1 pound shrimp, peeled and de-veined
    • Juice from 1/2 lime

    12 ounces Chinese noodles, cooked


    Start by making sauce: Whisk together ginger, rice vinegar, soy sauce, sesame oil, chicken broth, cornstarch, and chili garlic sauce. Set aside

    Heat 1 tablespoon vegetable oil in wok or large saute pan.  Season shrimp with salt and pepper, then add to heated oil.  Cook until shrimp turns pink, about 1 minute per side. Remove cooked shrimp to plate and squeeze on the lime juice. Keep warm.  

    Add the other 1 tablespoon of oil to pan and add vegetables. Saute on medium-high heat until crisp tender, about 3-4 minutes.  Pour in sauce and let simmer with vegetables for 1 minutes.  Add cooked noodles and toss to combine.  Top with shrimp and serve.

    Enjoy!


    Posted
    AuthorDave and Amy Koch
    CategoriesRecipes

    photo by Pictures from Heather

    So it's 2009 and parents everywhere are teaching their daughters to become sidewalk sales superstars, hawking their cookies to the masses.  A tradition for more than 90 years, as early as 1917, they began encouraging the Scouts to bake their own cookies locally.  They've been going strong ever since - except for WWII when they sold calendars instead.   

    According to an article on CNN Money titled, "Girl Scout Cookies: A tasty lesson in business," - what began as a simple way to raise funds has turned into a $700 million business and that the cookie drive teaches young women to become entrepreneurs.

    It's no joke.  Supposedly in 2008, 15-year-old Jennifer Sharpe from Dearborn, Michigan sold 17,328 boxes of cookies.  As if that's not enough; "The Cookie Queen" Elizabeth Brinton is attrubuted for having sold more than 100 000 box in her time as a Girl Scout between 1978 and 1985.  

    "I push a lot," she is quoted as saying, "Sometimes they would try to sneak past you, and you look them in the eye and make them feel guilty. After all, the cookies taste good, and it for a good cause."


    Here is a recipe from girlscouts.org (possibly from the 1930's):

    AN EARLY GIRL SCOUT COOKIE® RECIPE

    1 cup butter
    1 cup sugar plus additional amount for topping (optional)
    2 eggs
    2 tablespoons milk
    1 teaspoon vanilla
    2 cups flour
    1 teaspoon salt
    2 teaspoons baking powder

    "Cream butter and the cup of sugar; add well-beaten eggs, then milk, vanilla, flour, salt, and baking powder. Refrigerate for at least 1 hour. Roll dough, cut into trefoil shapes, and sprinkle sugar on top, if desired. Bake in a quick oven (375°) for approximately 8 to 10 minutes or until the edges begin to brown. Makes six- to seven-dozen cookies."

    - Dave Koch

    Posted
    Authordavid koch

    "My (little) garden" - photo by Erin Collins

    I'm not a health food nut, but I do enjoy some foods many consider should be reserved for Hare Krishna feasts and rabbits.  One of these delicious delicacies is sprouts.  I love 'em.  One really simple and delicious sandwich I make is just sprouts, honey, and peanut (or almond) butter.  Mmm.  

    There is plenty of new age hullabaloo about the benefits of eating sprouts and eating raw in general.  It is true that most enzymes are denatured, ergo useless, at temperatures above around 140 degrees Farenheit.  

    Enzymes are, on the other hand, also denatured by pH extremes like the acid in your stomach so... what's the point?  Most of what I found on the internet is ranges between the wacky and the outright delirious, but there are some good articles especially on making your own sprouts at home.

    I was reading www.wisebread.com (a website for frugal living) and they had this article on making your own sprouts.  It sounds really easy.  I want to experiment with sprouting different things, I'll bet they each have some different nuance.  

    Then I also found from www.living-foods.com there is a whole plethora of spout-it-yourself information in their article here.  Not only do they discuss the basics, but they go into different methods of sprouting, and have a nearly exhaustive list of specifics for each type of grain.  

    This list includes: amaranth, barley, buckwheat, corn, millet, oats, quinoa, rice, wheat, almonds, cabbage, fenugreek, flax, psyllium, chia, mustard, pumpkin, radish, sesame, sunflower, alfalfa, clover, garbanzo, beans (including: Anasazi, Black, Fava, Kidney, Lima, Navy, Pinto, and Soy), lentils, Mung beans, peanuts and peas.

    I'm not alone with my sprout sandwiches.  Here are a few more that I found:


    From www.thekitchn.com -  their Alternative Sprouts Sandwich

    From www.milkandhoneyfarm.com - thier Easy Tomato and Sprout Sandwich (at the bottom of the page)


    And from www.goodmagazine.com here is a really good looking recipe for what they call  Project 009: Avocado And Sprouts Sandwich

    - Dave Koch

    Posted
    Authordavid koch

    photo by Average Jane

    It is just two days before "turkey day" and if you were even thinking about making turkey, know that brining helps keep meat moist and flavorful during cooking.  I've been looking around and started running into some intriguing ingredients that chefs were putting into their brines.  

    Some of the more unusual brines or unusual ingredients in brines we’ve run into are: 

    7)  Apple juice - from Andreas Viestad via washingtonpost.com

    6)  Allspice berries - from Alton Brown via foodnetwork.com

    5)  Candied Ginger - also from Alton Brown via foodnetwork.com

    4)  A whole bottle of wochersher sauce [sic] - from N7uvh at grouprecipes.com

    3)  Dark Beer - from Emeril Lagasse via wchstv.com

    2)  Riesling - from NcMysteryShopper,at recipezaar.com (There's also a Riesling Gravy there)

    1)  Spiced rum, "such as Captain Morgan Original" - from the South Florida Sun-Sentinel


    You can find myriad methods online but there seems to be common themes that nearly all of them stick to.  Here is a recap of some of the steps involved:

    1.       Dissolve salt and sugar in boiling water
         a.      Keep your “salt to sugar” ratio between 2:1 and a 1:1
         b.      Your brine can anywhere between a 4:1 and a 10:1 “water to salt/sugar” ratio
         c.      Cups to cups, quarts to quarts, it doesn’t matter.  Just watch the ratios.
         d.      Don’t worry about this too much


    2.       Add your aromatics 'at will'
         a.      Crushed garlic
         b.      Pepper or Peppercorns
         c.      Chopped onions
         d.      Rosemary
         e.      Cilantro
         f.       Thyme
         g.      Sage
         h.      Really anything, even just “poultry” or “Italian” seasoning will work fine


    3.       Chill the brine solution in the refrigerator for a while – or chill immediately with ice


    4.       Place the bird into a container and cover it with the chilled brine
         a.       An easy way to do this is to start by placing it in a double layer of oven bags then into a cooler or an ice chest,
         b.      Keep the bird cold with either ice, ice packs (outside of the oven bags)
         c.      You’re allowed to worry about this step, keep it cold! 

    5.       Brine for 4-24 hours
         a.      Ensure the bird is well dried before placing it in the oven, you can use paper towels
         b.      Or, you can even dry it overnight in the fridge on cooling rack in a rimmed baking sheet

     Try our Chelada Turkey Brine!  It's amazing.


    Posted
    Authordavid koch
    CategoriesRecipes